I recently had to create the motor mount for my firefighting robot and here is how it went!
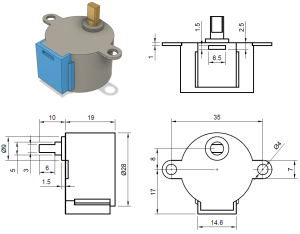
First I found the photo I needed that was best reference to my motor mount. Which looked like this,

I got this photo from this link.
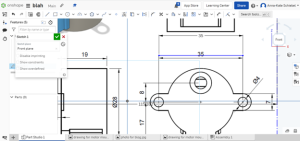
To import this photo to onShape I needed to choose the face I wanted to work with, and I decided to work with the front face.

Then after that I selected the sketch tool and found where the insert photo button was.

Once I found that I clicked on it and then pressed the import button at the bottom of the page. (It looks like a plus symbol). When that came up, I clicked on the photo I wanted to insert (which is the one above).
It brought it into the pop up for images and I clicked on it.
Then I needed to drag it to fit in my box.

Once I did that I changed the scale to fit 35 mm.

To get that accurate I drew a line 35mm long and scaled the picture to match it. 
After designing and scaling. I then finished my project and imported an STL file into PrusaSlicer. I transported it in and set the settings for millimeters. When it got transported in it looked like this,

The only problem with this, it the 3D printer can not print something like that without supports. So I had to go back in and redesign it to where the hole was on the bottom and it built upwards!
I then transported the G-code to my flash drive and went to print it in the makerspace. It took about 50 minutes to an hour to print.

Recent Comments