Project: Motor Mount
For this project I used this drawing as reference to design my motor mount. The drawing was pulled from: https://cookierobotics.com/042/
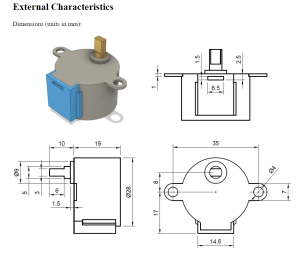
from: https://cookierobotics.com/042/
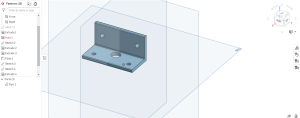
I designed my motor mount in Onshape, using the reference photo above, the physical stepper motor its self, parts of a tutorial provided by the Professor, and dimensions for the bracket provided by the Professor.
In Onshape I created an L shape drawing, making the height of the bracket 25mm, I then did a same size constraint to have the length of the bracket match the height. I made the thickness of the upper part bracket 3 mm, I then did another same size constraint to the lower of the bracket to ensure it was also 3 mm thick. I then extruded the bracket using the symmetric option, so it extrudes equally on both sides of the sketch plane. I extruded the sketch by 50mm.
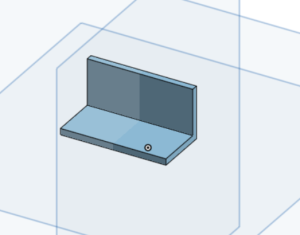
Motor mount with no holes.
Using the know midline (sketch plane) I draw a circle that was 9mm in diameter to fit the shaft of the gear, this circle was near the horizonal portion of the bracket. From this circle I drew 2 lines each one going out 17.5mm from the center of the circle, I then drew a line from the ends of each of these lines that moved away from the horizontal portion of the bracket I then made these line 8mm long. From the end of these lines I drew a circle (on each end) that was 4mm in diameter. This resulted in the part of the bracket where the motor its stepper would go. After drawing these circles I then moved to the Sketch plane line on the upper part of the bracket, and drew 2 lines going out 17.5mm left and right. I then drew 2 holes 4mm in diameter from both ends of these lines. After drawing these lines I extruded all these holes into the bracket to remove the material. I set the extrude settings to have extrusion go to the face opposite of the drawings. This then create the holes for my motor mount.
From this point I exported the object and saved the object as a 3MF files so I could import it into the PrusaSlicer, after importing the object into the PrusaSlicer I set the material to be used to Generic PLA, I had the print settings as .15mm, I set he printer as the Original Prusa Mini & Mini+, I then set the infill at 20%. I then sliced the object, I used the default settings for the slicing, I then exported the G-Code to a USD Thumb drive and printed the object on a Prusa Mini printer.
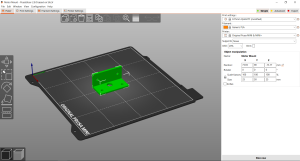
Motor mount in the PrusaSlicer
The motor mount took 58 minutes to print, and it came out of the printer with a decent quality, I took my stepper motor and attacked it the bracket and it fit into the holes, and the attachment holes lined up as well.
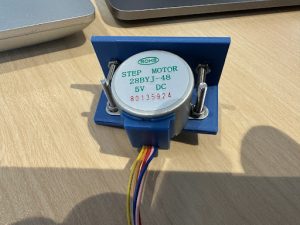
Printed motor mount and mounted stepper motor
Recent Comments