Problem:
The main goal of this assignment was to create a robot that could go through a maze and then put out a fire at the end. The maze consisted of either 2 left turns or 2 right turns. Extra credit was given if you could execute the maze in both directions with the same code. We were expected to use code and experiences from earlier in the semester to complete this. We needed to design and print wheels and motor mounts, use ultrasonic sensors to sense the walls, use stepper motors to drive the robot, and correctly use a flame sensor that triggers a fan to extinguish the fire.
Solution:
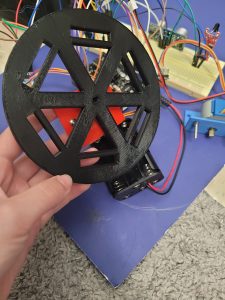
First, my partner and I had to design and print out wheels for our robot. Below is a picture of my final design.
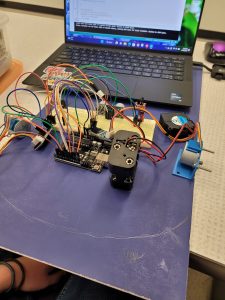
Then we worked on getting the layout, trimming the board, securing all the parts, and double-checking the wiring.
Next came the coding. My partner and I decided to have our robot try to sense a flame if none then it would drive forward a certain amount and try to sense a wall. If there was no wall it would continue its journey and if there was a wall it would turn right. Then it would check if there was still a wall in front of it and if there was it would turn around. We didn’t have very many hurdles when it came to this project. We mostly just had to make a few tweaks to the code. Below is a video of the first test run for reference.
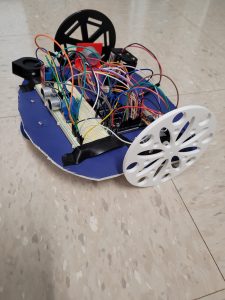
What really makes our robot ours are the wheels, shape, and abilities. The wheels are much bigger than everyone else’s which really sets us apart. Also, we rounded the corners on our board while everyone kept the edges straight. These are mostly superficial differences the biggest accomplishment is that our robot can run the route in both directions. For this project, I created my own library of functions. I copied programs from earlier in the semester into their own functions, created a turnaround function and a turnright function, and related them all together in a main function. My partner added in a victory music function as well. Our main hurdles were adjusting values from previous programs to better fit this project. Below are the successful videos of the left and right turns.
Overall, this project went exactly as I wanted it to. If I had more time I would turn it into a zero turn and have it read the distance and go exactly that distance instead of having to stop every 5 seconds to take measurements.
For even more information on this project here is a link to my partner’s project page as well.
Recent Comments