Task: In my Introduction to Engineering Principals and Practices class, I was assigned with the task of CAD modeling and printing a mounting bracket that properly supports a 28BYJ-48 stepper motor. This project is the first of a series of tasks to create a flame extinguishing robot that can navigate through a maze.
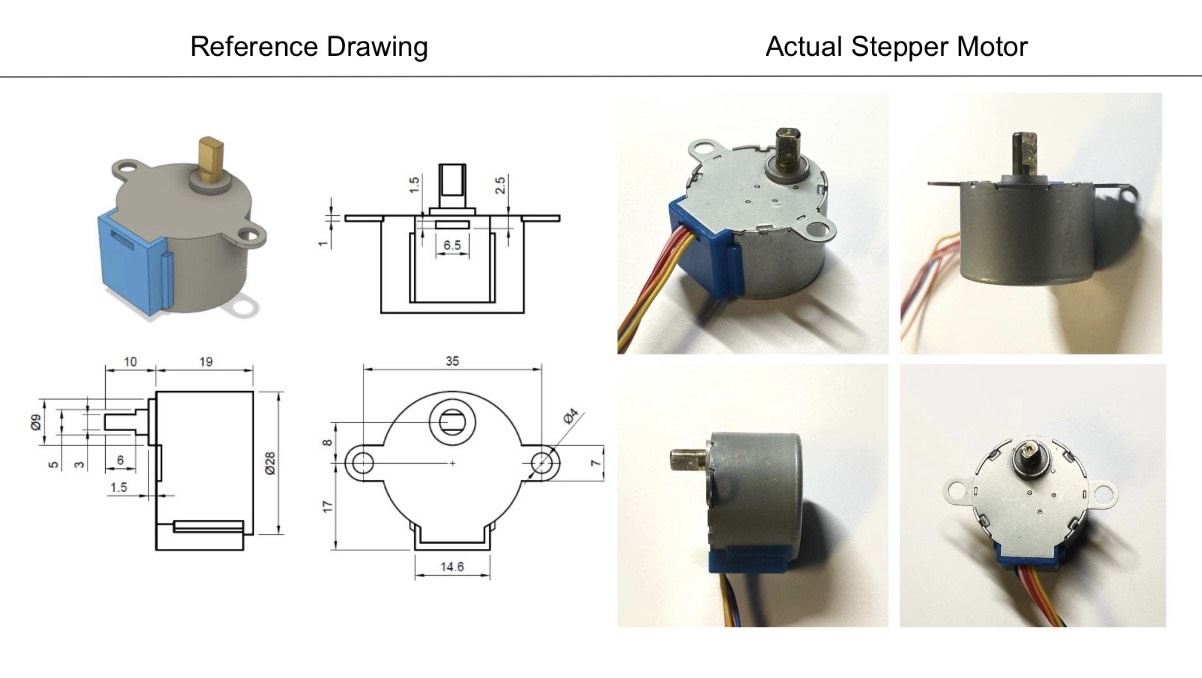
3D Modeling Process, Finding Dimensions: Utilizing an online CAD software called Onshape, I was able to 3D-model and design a mounting bracket by referencing the dimensions of the stepper motor. First, I found the dimensions of the stepper motor online. By using the reference image, I was able to establish the final dimensions of my motor. I have included a comparison of the reference image and my stepper motor. The link to the website of the reference image is located here.
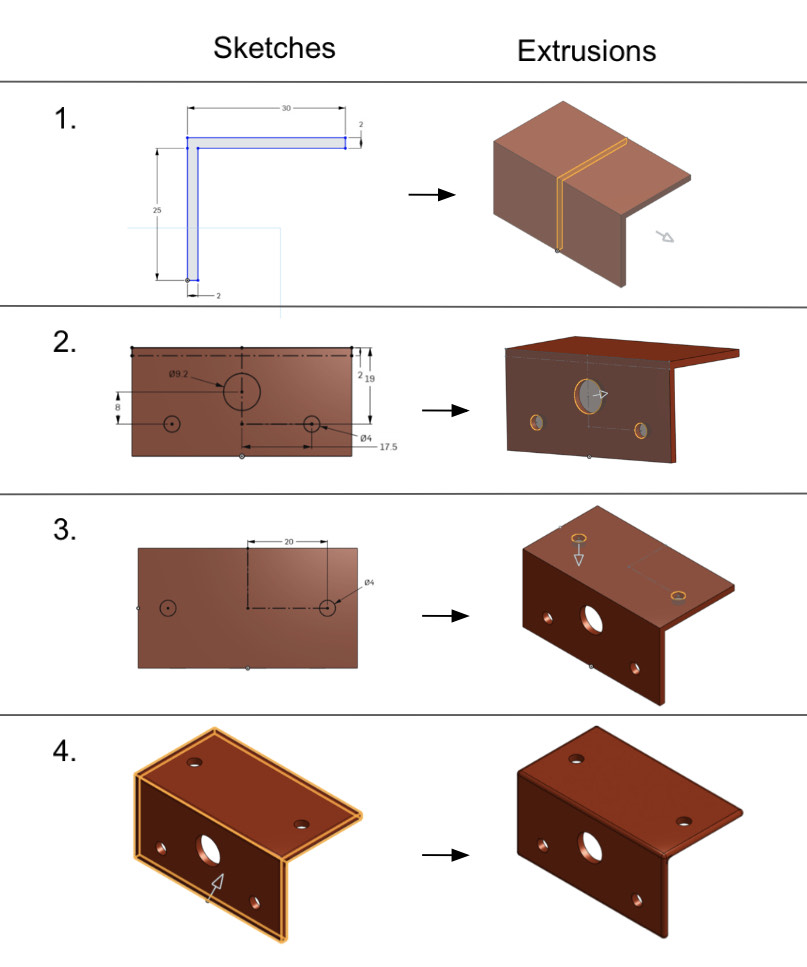
3D Modeling Process, OnShape Part 1: After reviewing the dimensions for the stepper motor, I used OnShape to begin the process of 3D modeling the motor mount. By adding tolerance to the sizes of the holes on the motor, I settled on the dimensions I would use. By creating four main sketches and four main extrusions, I finalized the motor mount. I have included images of the four sketches and four extrusions I used to create the mount.
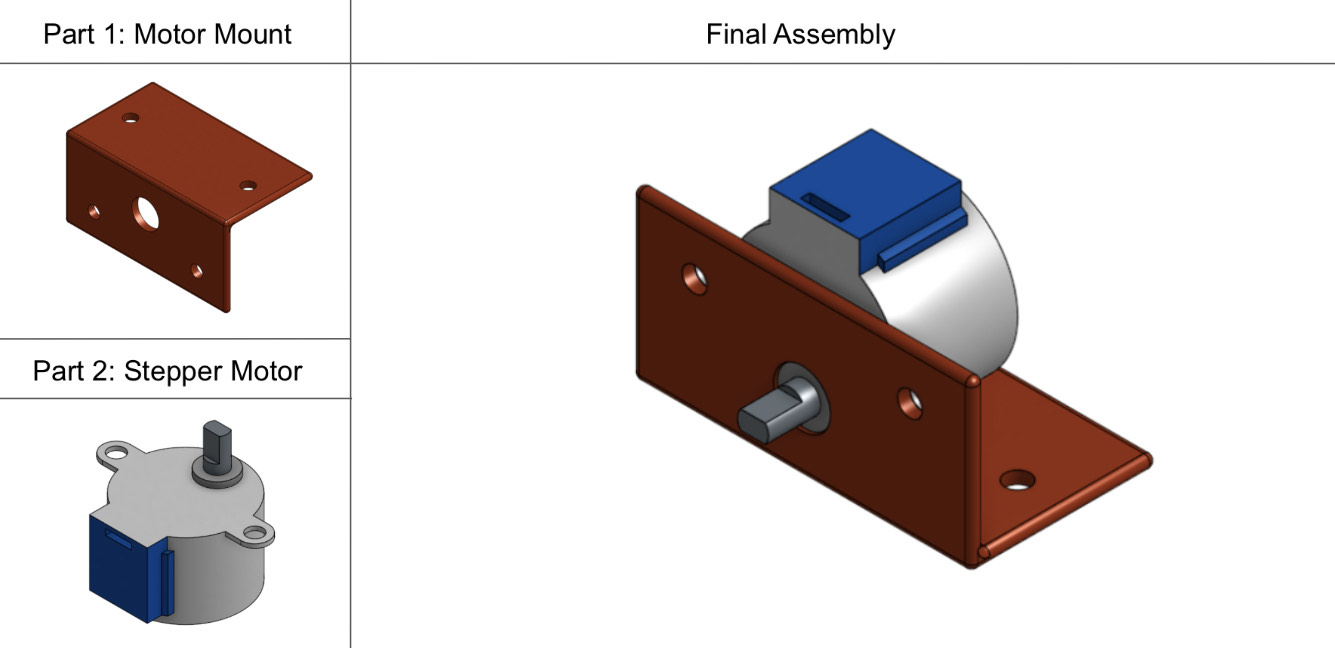
3D Modeling Process, OnShape Assembly: Once the CAD model of the motor mount was created, I downloaded a STEP file of the 28BYJ-48 stepper motor from the same page as the reference drawing, located here. After using the Boolean tool to merge the parts of the motor from the STEP file together, I had both parts ready to be combined in an assembly. By using fastened mates on Onshape, I created my final assembly.
Slicing: Using a slicing software called PrusaSlicer, I inserted the CAD file of my motor mount onto a virtual build plate. The print settings I used are the following:
- QUALITY: 0.20mm Quality
- FILAMENT: Generic PLA
- PRINTER: Original Prusa MINI & MINI+
- SUPPORTS: N/A
- INFILL: 15%
After rotating the motor mount along the x-axis for easier printing and enabling ironing, the model was ready to print.
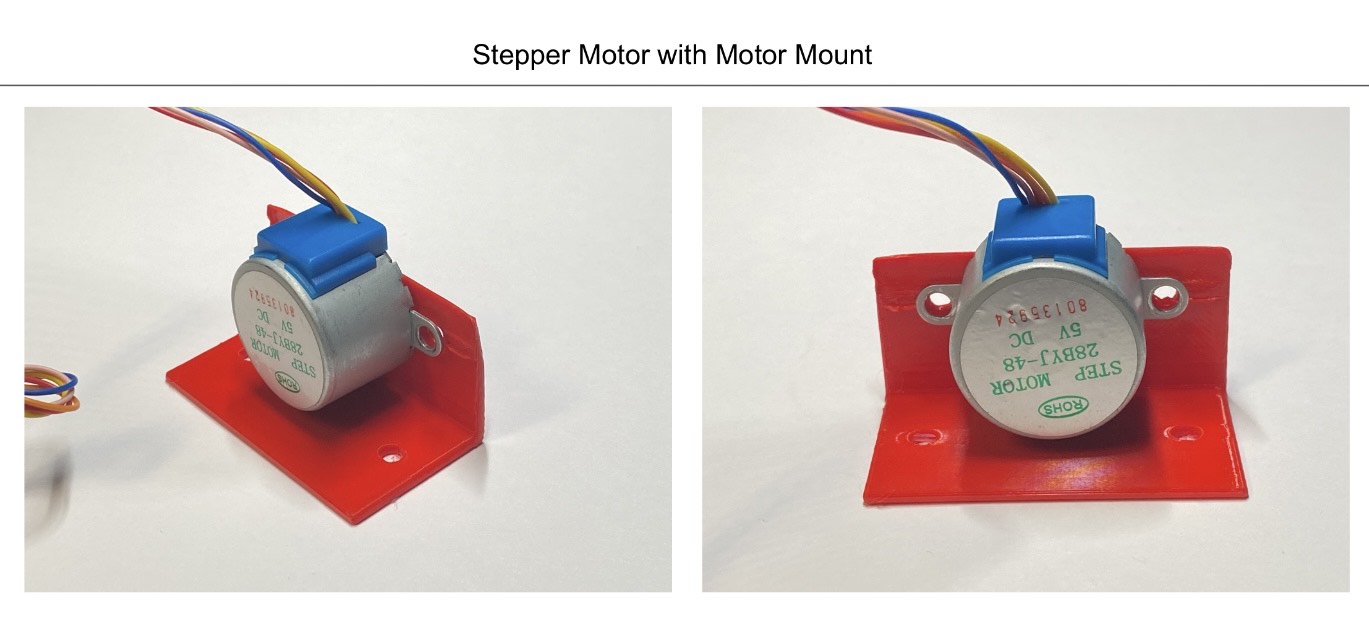
3D Printing: After making a trip to the Makerspace located in the Belk Building, I was ready to 3D print. I used an original Prusa MINI+ printer with red PLA filament for my final design. I have included images of the final model below:
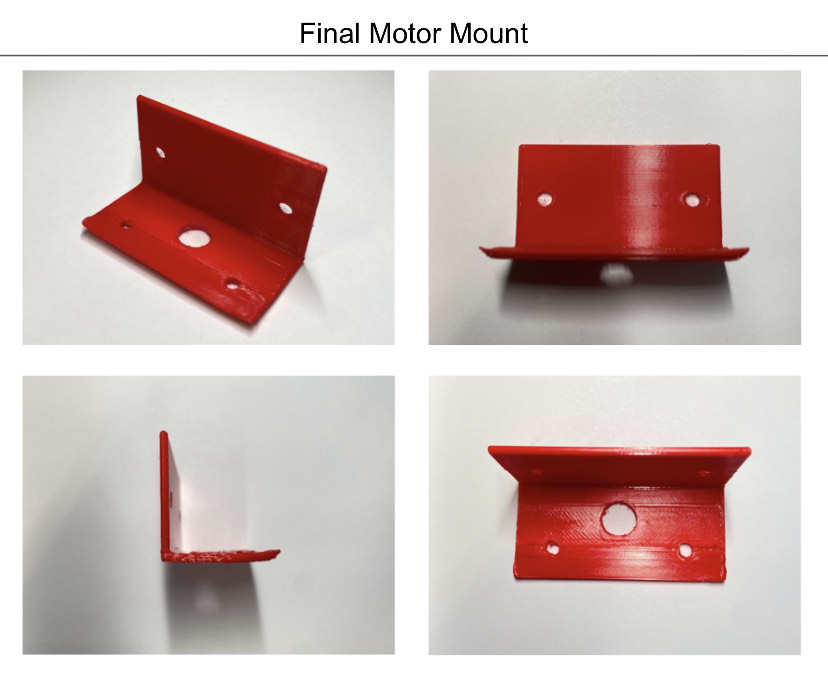
Final Product: While I do not yet have the screws to fully secure the mount, the motor fits snug inside of the mount and the holes for the screws line up correctly. The final product works as needed. Images of the motor connected to the mount are shown below:
Recent Comments