Task: In my Introduction to Engineering Principals and Practices class, I was tasked with designing a wheel hub and a wheel that would properly fit onto a 28BYJ-48 stepper motor shaft when 3D-printed. This is the second of a series of tasks to create a flame extinguishing robot that can navigate through a maze.
3D Modeling, Finding Dimensions: Utilizing an online CAD software called Onshape, I was able to begin the process of designing the hub for my wheel. Using a reference drawing located here, I was able to investigate what dimensions and tolerance I should use with my hub. The reference drawing is located below. Tolerance must be considered as well to allow the 3D print to fit snug around the motor shaft.
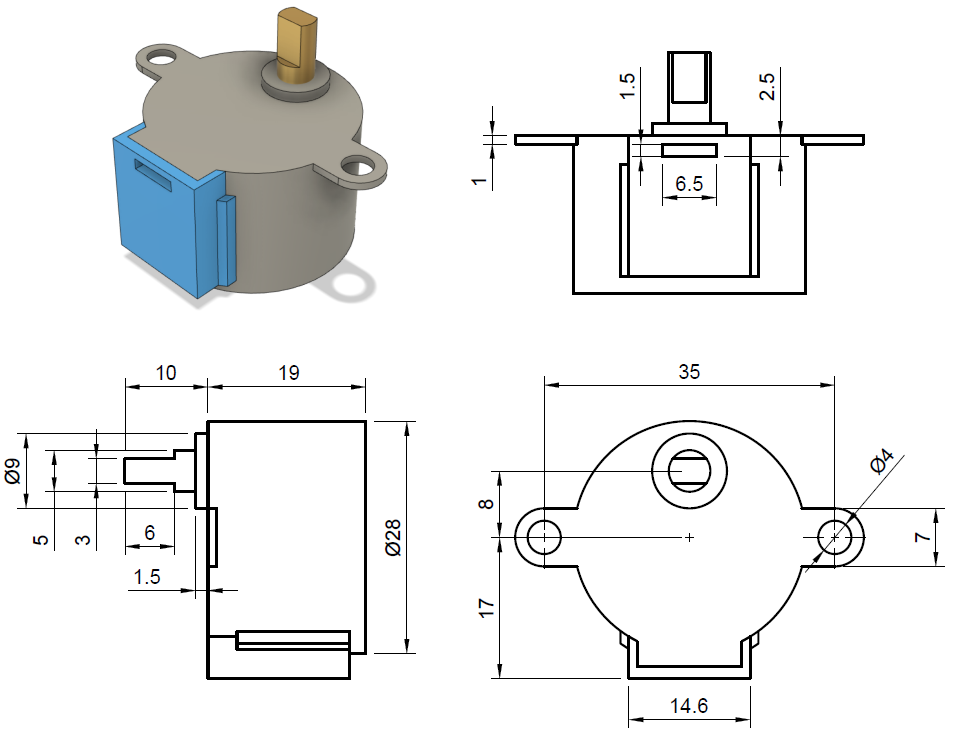
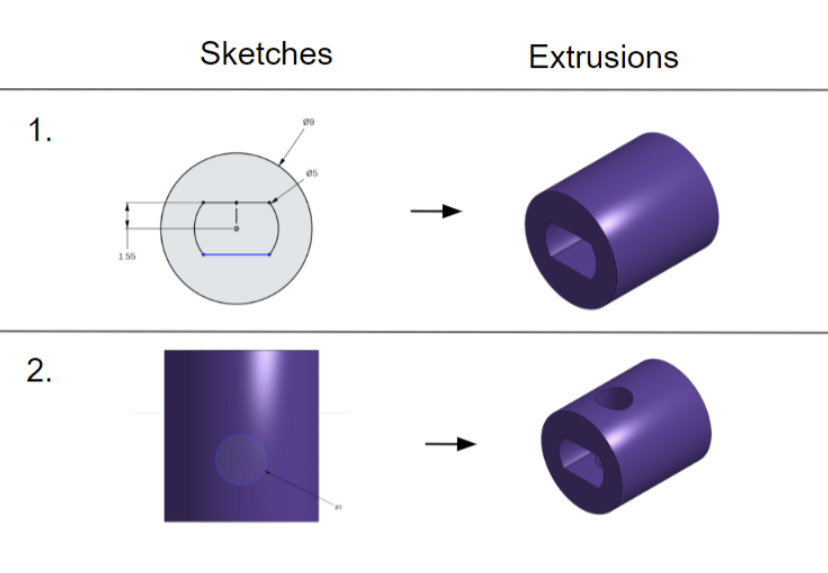
3D Modeling Process, OnShape – Attempt 1 (Hub): After reviewing the dimensions from the drawing, I established the dimensions I would use to create my CAD model. In my original model, I used the following dimensions: 9mm for the outside circle diameter, 5mm for the inside circle diameter, and 3.1mm for the depth of inside circle, and for the 10mm height of entire part. The creation of the part is shown below.
3D Printing – Attempt 1 (Hub): Following the completion of my CAD model, I 3D printed the piece using an Original Prusa MINI+ printer. Before printing, I used a software called PrusaSlicer, where I uploaded my part onto a virtual build plate. The print settings I used contain the following:
- QUALITY: 0.20mm Quality
- FILAMENT: Generic PLA
- PRINTER: Original Prusa MINI & MINI+
- SUPPORTS: N/A
- INFILL: 20%
Results of Printing Attempt 1: Once the hub was finished printing, I tested the part on my stepper motor. It was clear that the part was too small to fit onto the motor shaft. The engineering design process is iterative, so I decided to adjust my dimensions and reprint.
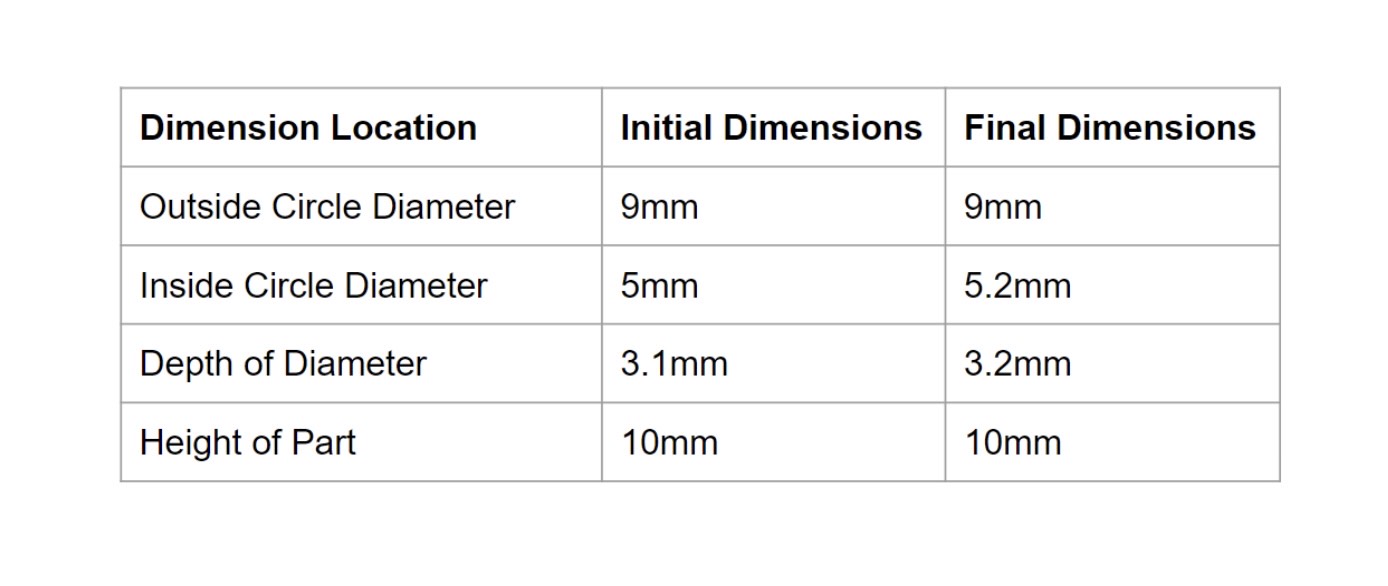
3D Modeling Process, OnShape – Attempt 2: After reviewing my previous dimensions, I studied which parts of the hub were too small for the motor to fit. By doing so, I was able to establish the final dimensions of the hub, located in the chart below.
Results of Printing Attempt 2: Using the same print settings and filament as before, I was able to create a part that fits perfectly around the motor shaft. The print took about five minutes to print.
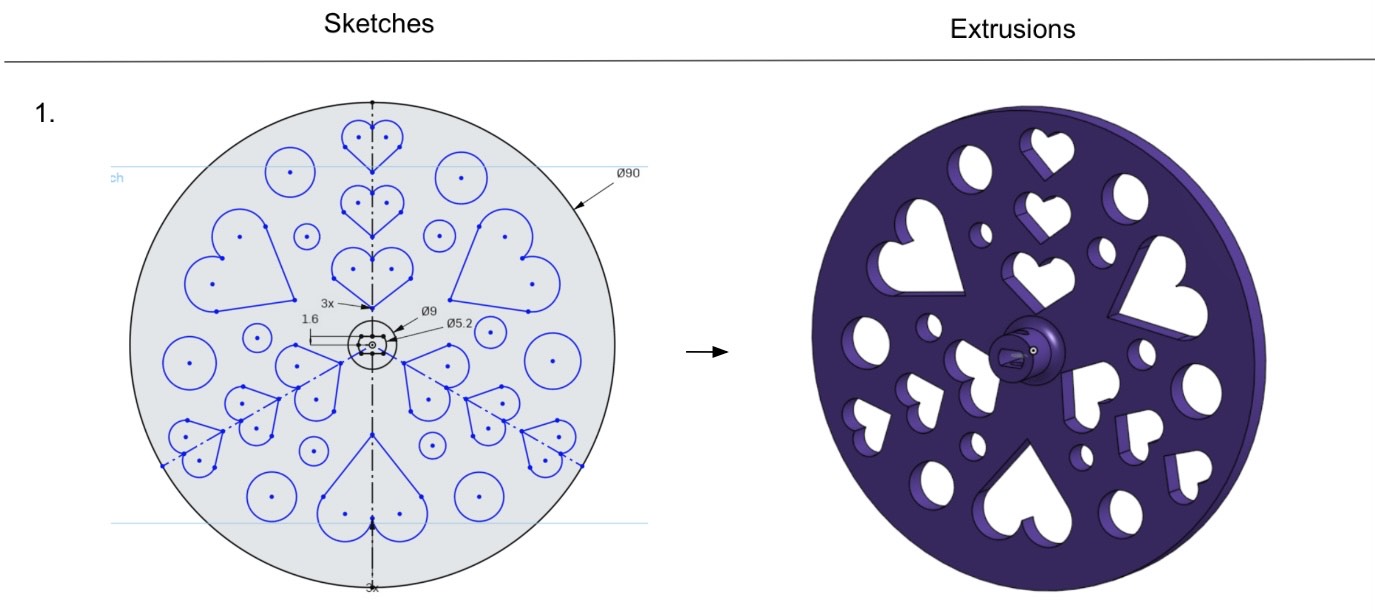
3D Modeling Process, OnShape – Final Wheel: Now that I knew the final dimensions for my hub, I continued the process of making my wheel by CAD modeling the wheel itself. I created a 90mm wheel and used both heart and circles in my design. Using creativity and considering durability, I created the following:
Results of Printing Final Wheel: Using the same settings and filament as the original print, I was able to create my final wheel for the project. The final print took around one hour and forty minutes to print using an Original Prusa MINI+ printer with golden PLA filament. Below, I have included images of all three prints, including my final wheel.

Recent Comments