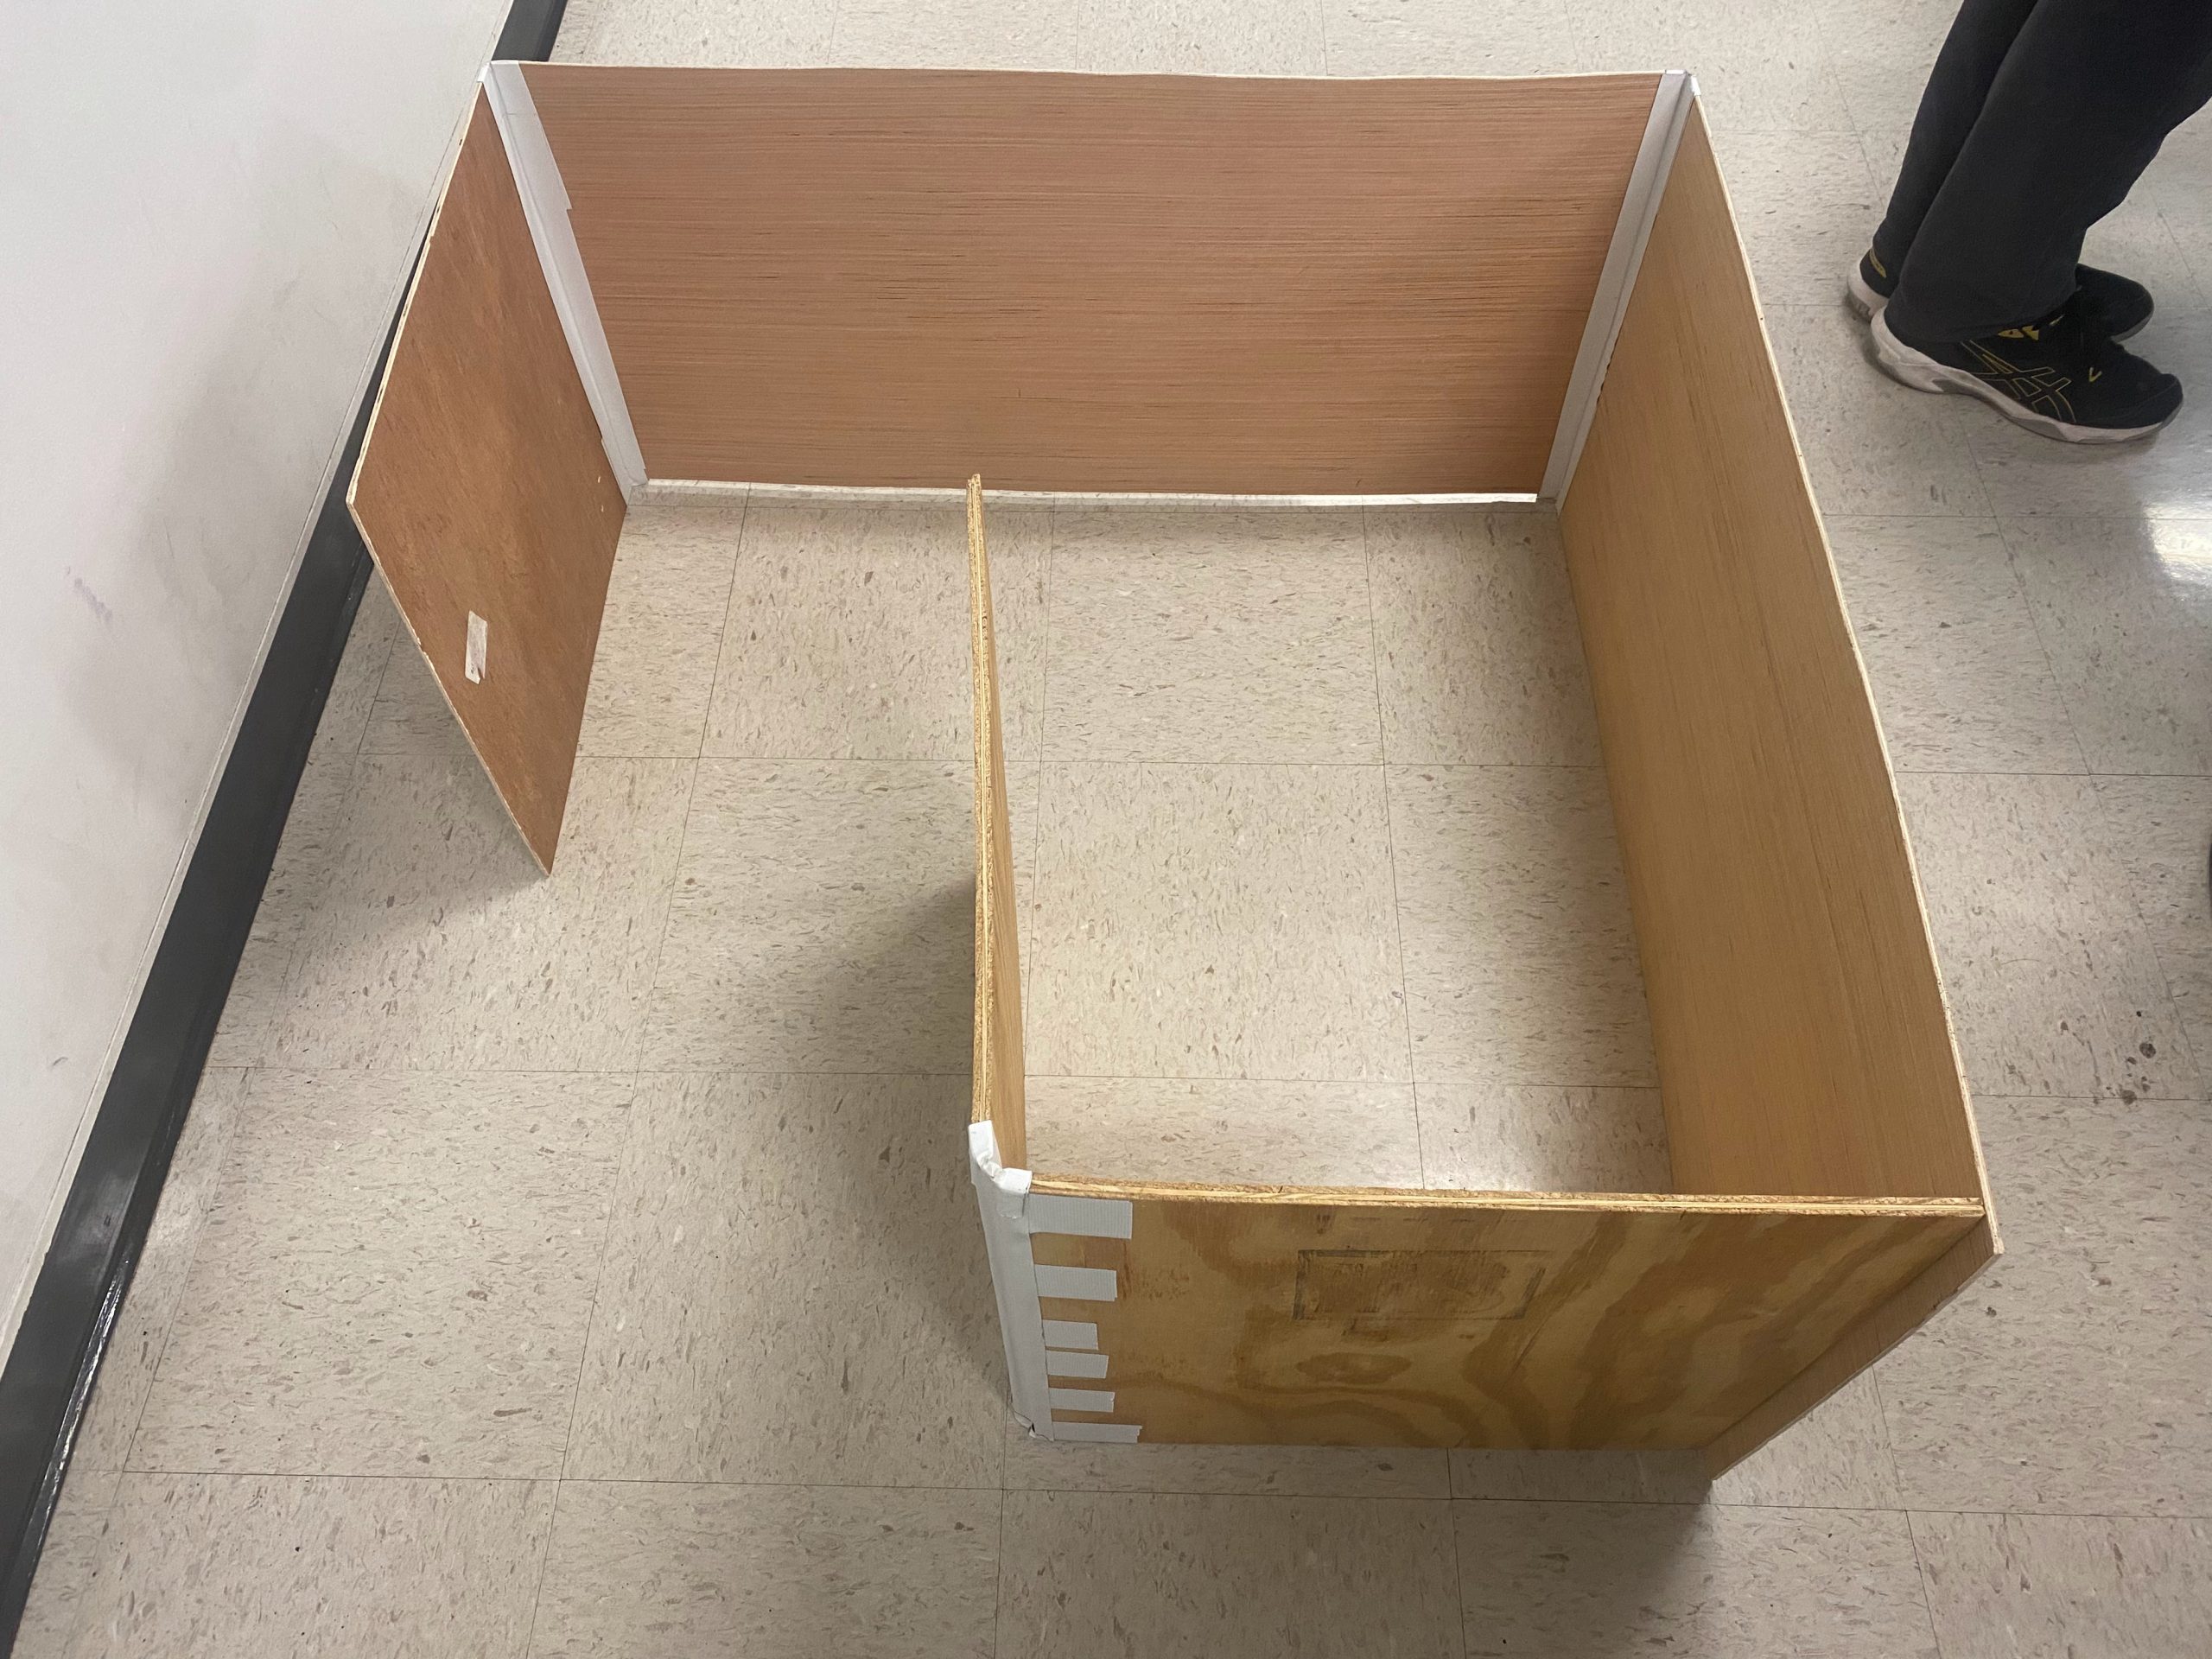
Task: In my Introduction to Engineering and Principles class, my team member Cayden Ebright and I were tasked with designing a flame-extinguishing robot that could efficiently navigate a maze. The maze is divided into multiple 18 inch by 18 inch squares that can be oriented in two directions (left-entrance and right-entrance). The orientation can change whether the robot enters from the left or the right. The expectations for our project include utilizing skills such as C++ coding, CAD modeling, critical thinking, and communication. I have included an image of the maze below:
Preparation: To prepare for this project, both of Cayden and I worked on learning to establish parts of the robot individually. I created multiple systems and designs such as a Flame Sensor and Fan System, Ultrasonic and Servo System, Hub and Wheel, and a Motor Mount. Each one of these projects helped to provide the necessary skills to build a working robot such as 3D modeling/printing, coding in C++ through the use of Tinkercad, and wiring an Arduino board.
Approach: To approach this task, Cayden and I brainstormed a multitude of ideas. Individually, we researched and wrote down a list of ideas. The list included making a tank, using water instead of a fan, having six wheels, and 3D printing the robot. By combining our ideas, we decided to create a tank-inspired robot with 3D-printed treads and a 3D-printed chassis. To save filament and time, we decided on having four wheels and using the fan to blow out the fire. A link to Cayden’s blog can be found here.
Code: First, Cayden and I worked on writing the C++ code for the robot. Utilizing the codes from previous projects, we combined them to create a program that would work with our robot. While I am not as familiar with coding as Cayden, he was able to walk me through his process of writing code and debugging. Using if/else statements, clockwise, counter-clockwise, and scanning functions, the program was written so that the Arduino could follow through the maze and scan its surroundings. One issue we had with the code was that the stepper motors would not rotate in the direction we planned for it to. At times, the motors rotated in opposite directions instead of the same. By changing the clockwise function of one of the stepper motors to the counter-clockwise function, the motor followed the program correctly.
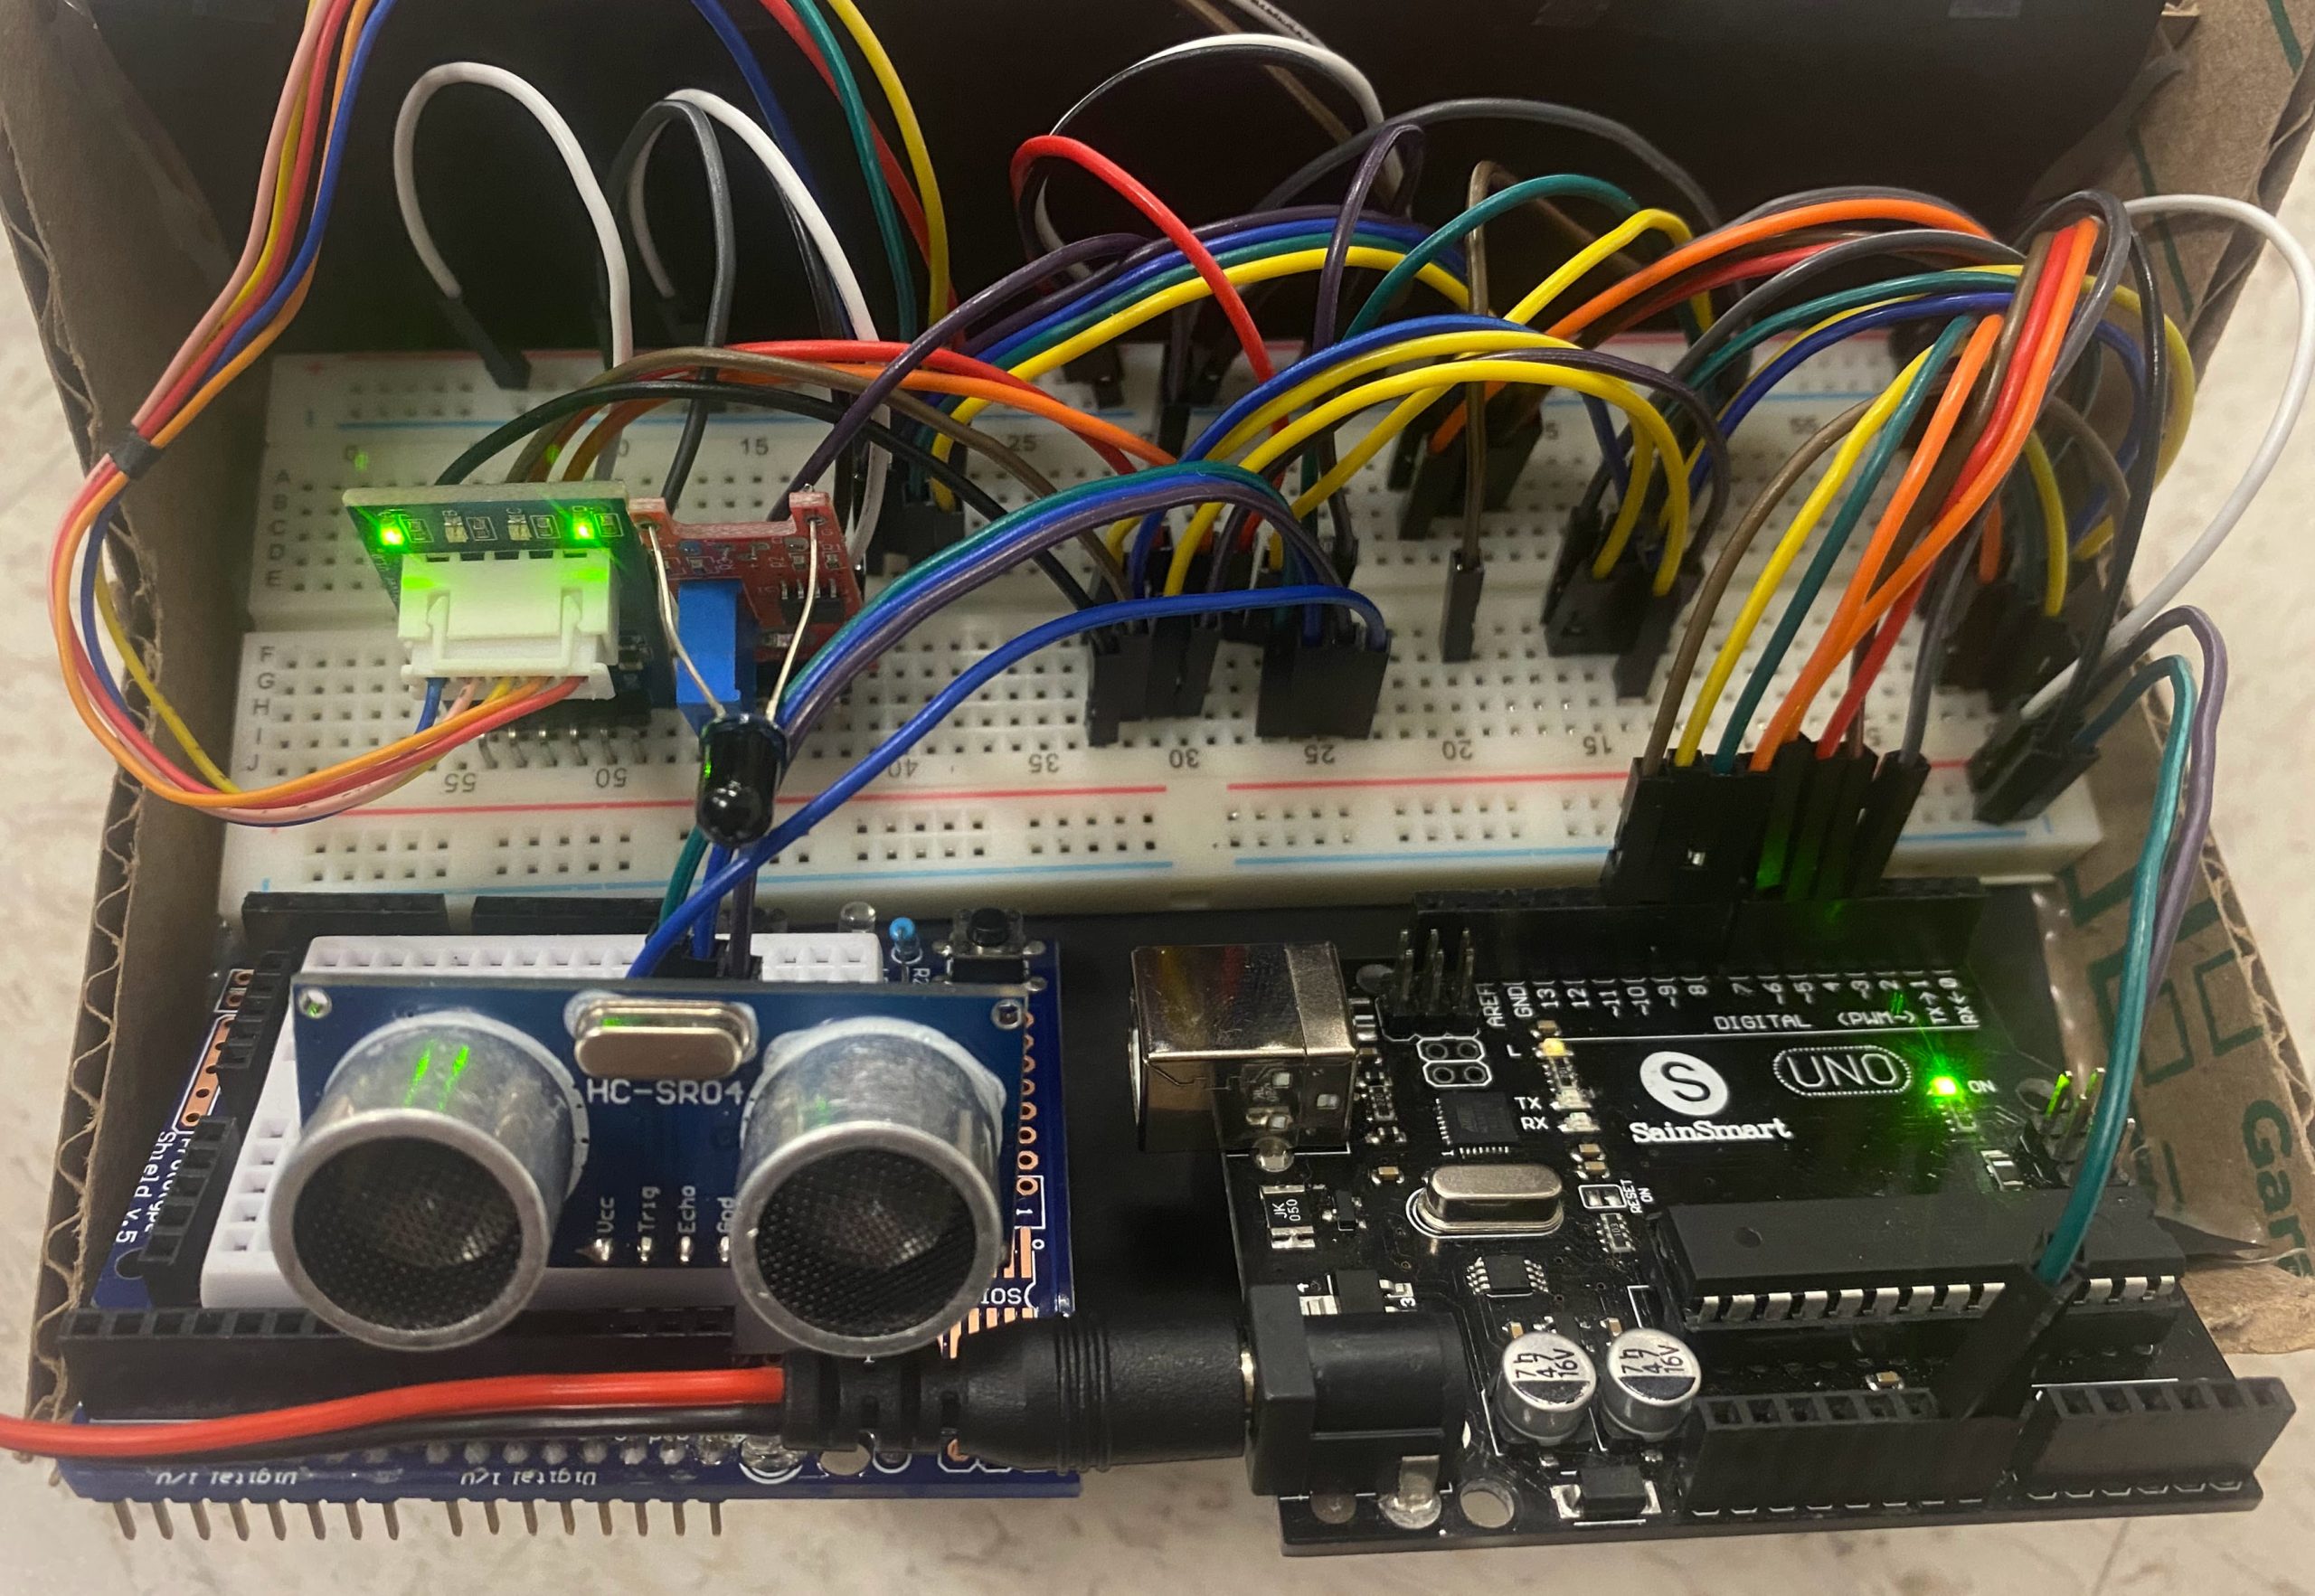
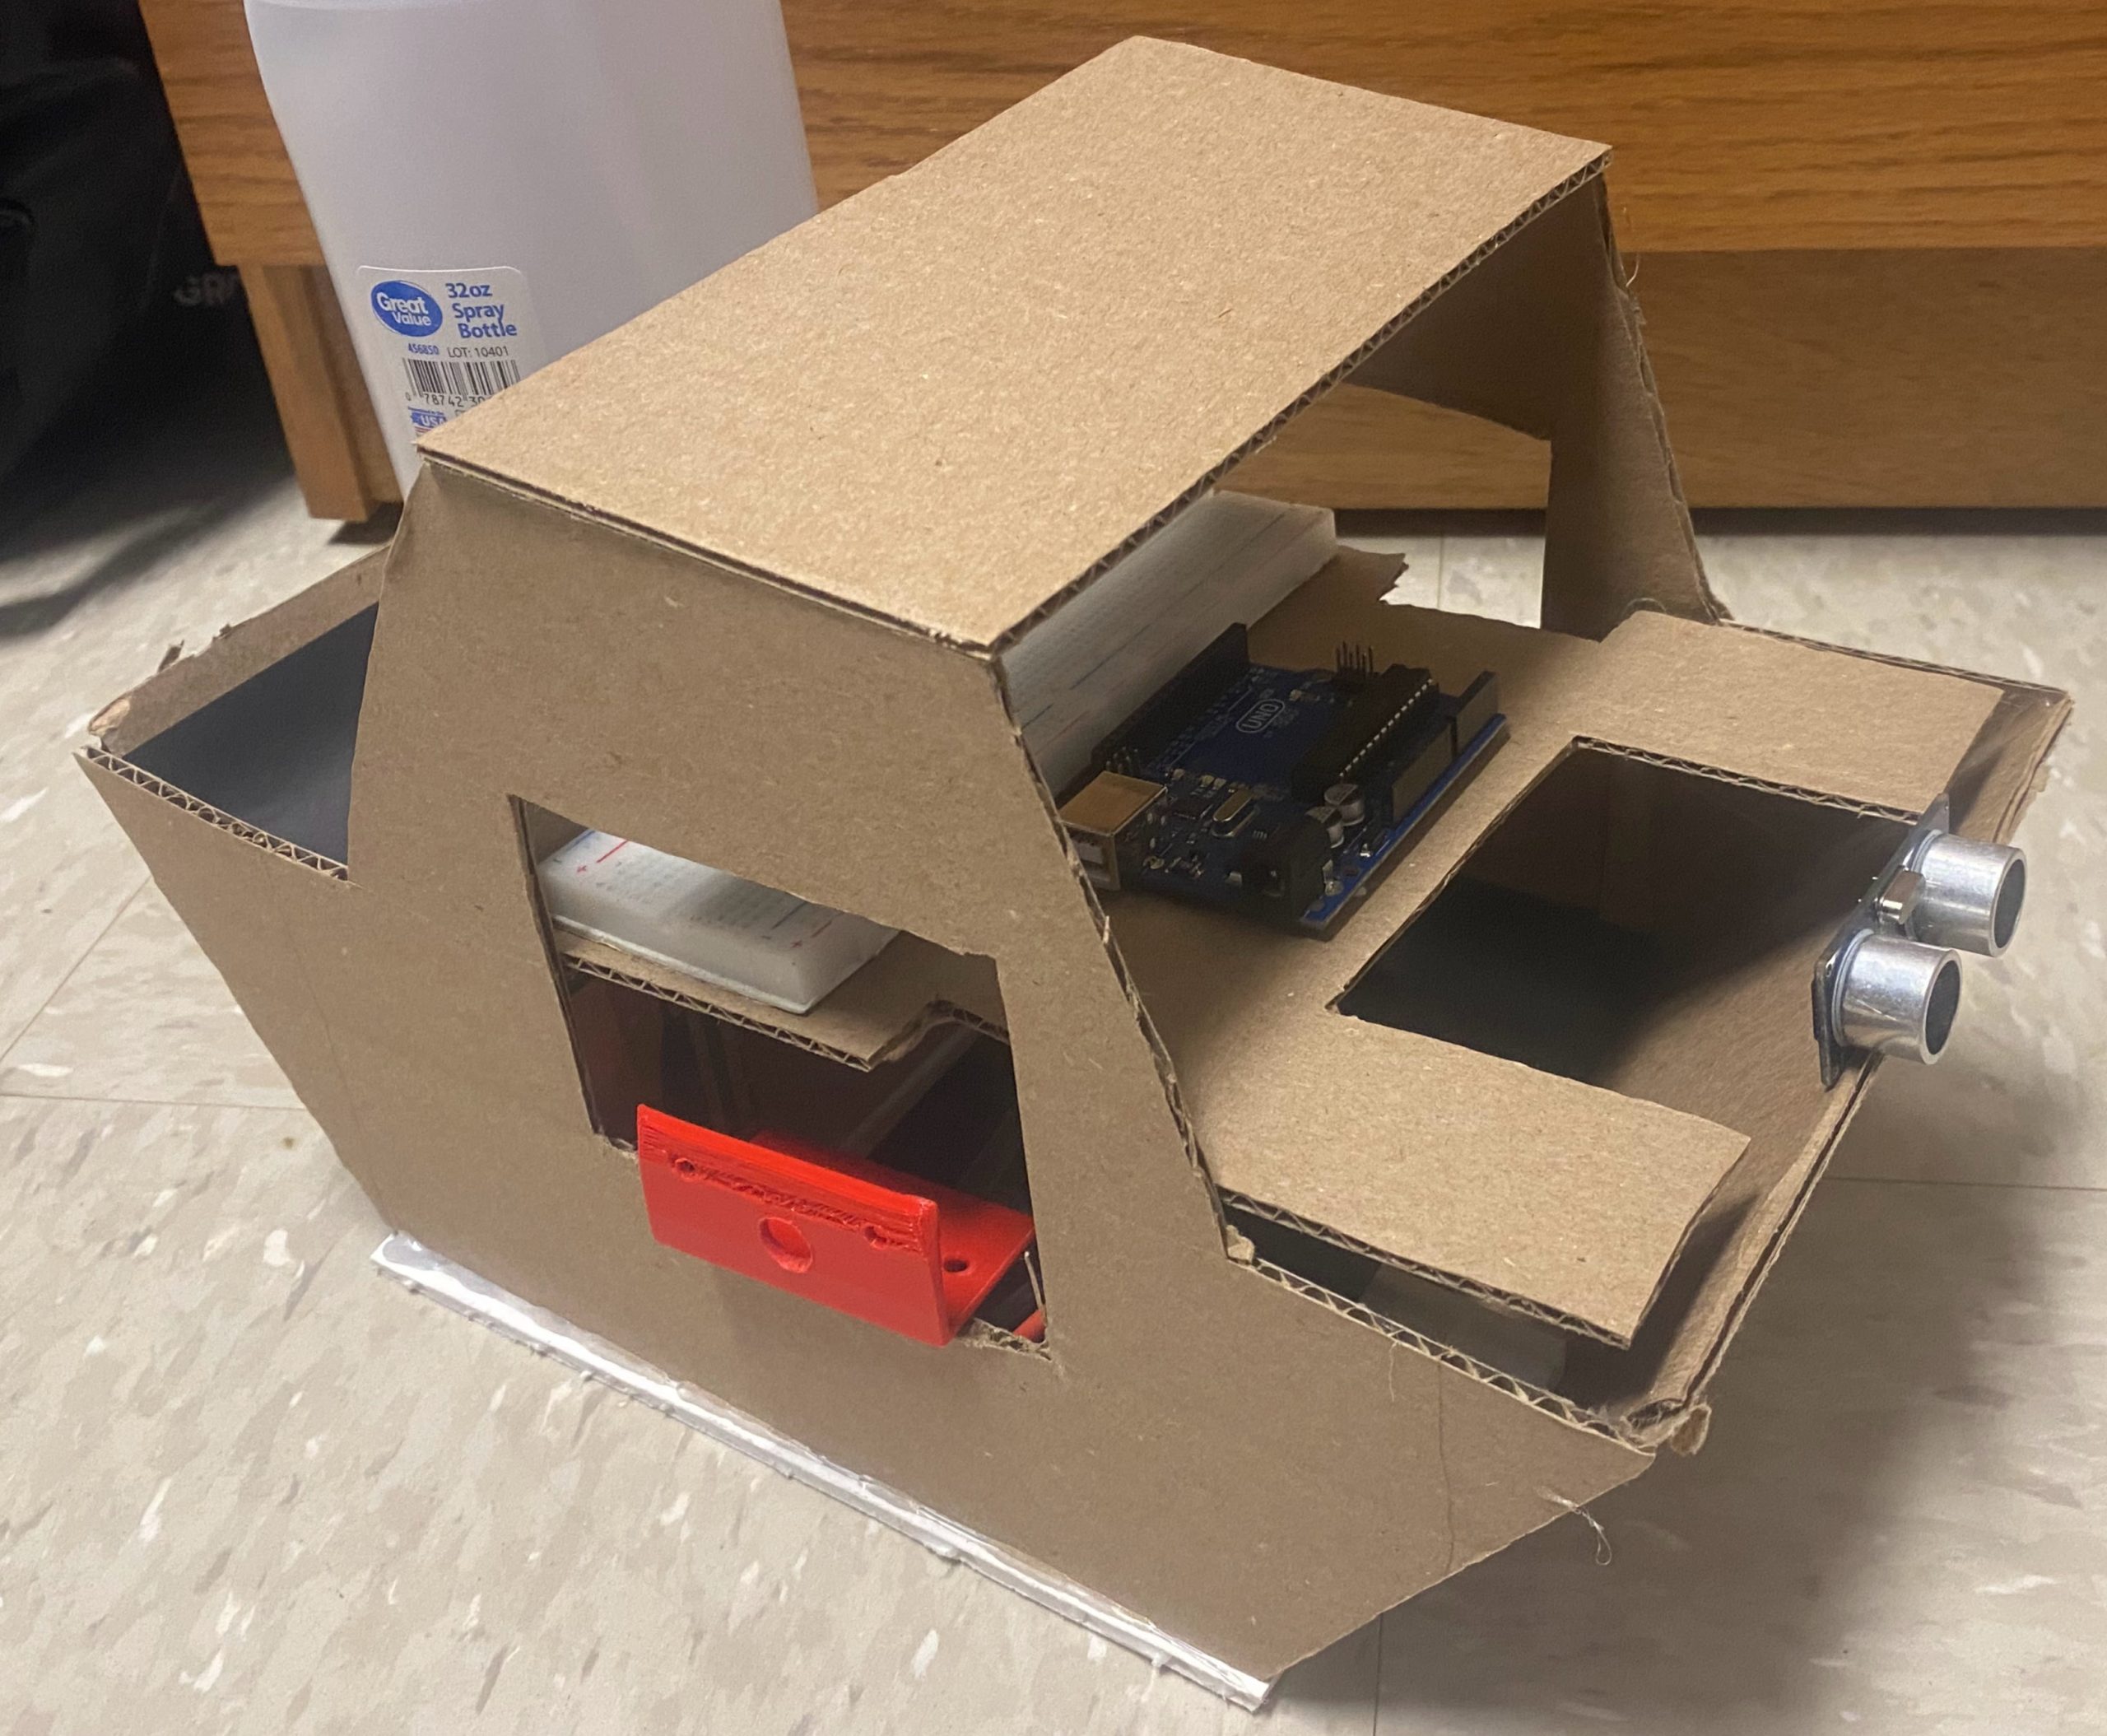
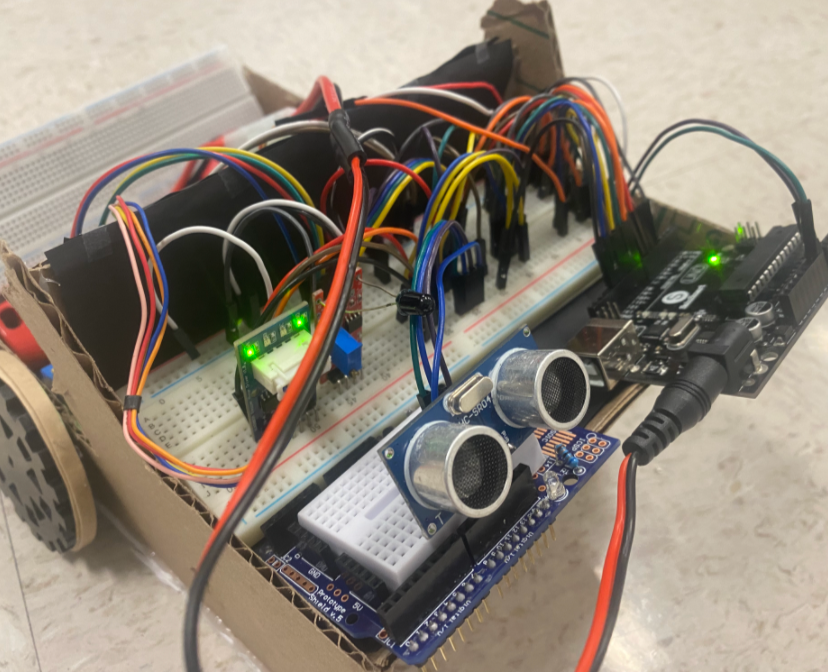
Wiring: The components wired in our robot included one Arduino Board, two Breadboards, one ultrasonic sensor, two stepper motors, one flame sensor, one relay, and one fan. Originally, we had planned on using two ultrasonic sensors that would be located at 45-degree angles on the front left and right corners of the robot, but we decided against that when doing the wiring for simplicity. Instead, our ultrasonic sensor is located at the front of the robot to allow it to scan its environment while moving. Above the ultrasonic sensor is the flame sensor, which can detect heat from a light or fire source. While the fan is not included in the image, its designated location is the front right corner next to the Arduino Board. Cayden used his knowledge from the previous projects to finalize the setup of the robot. I have included an image of the wiring:
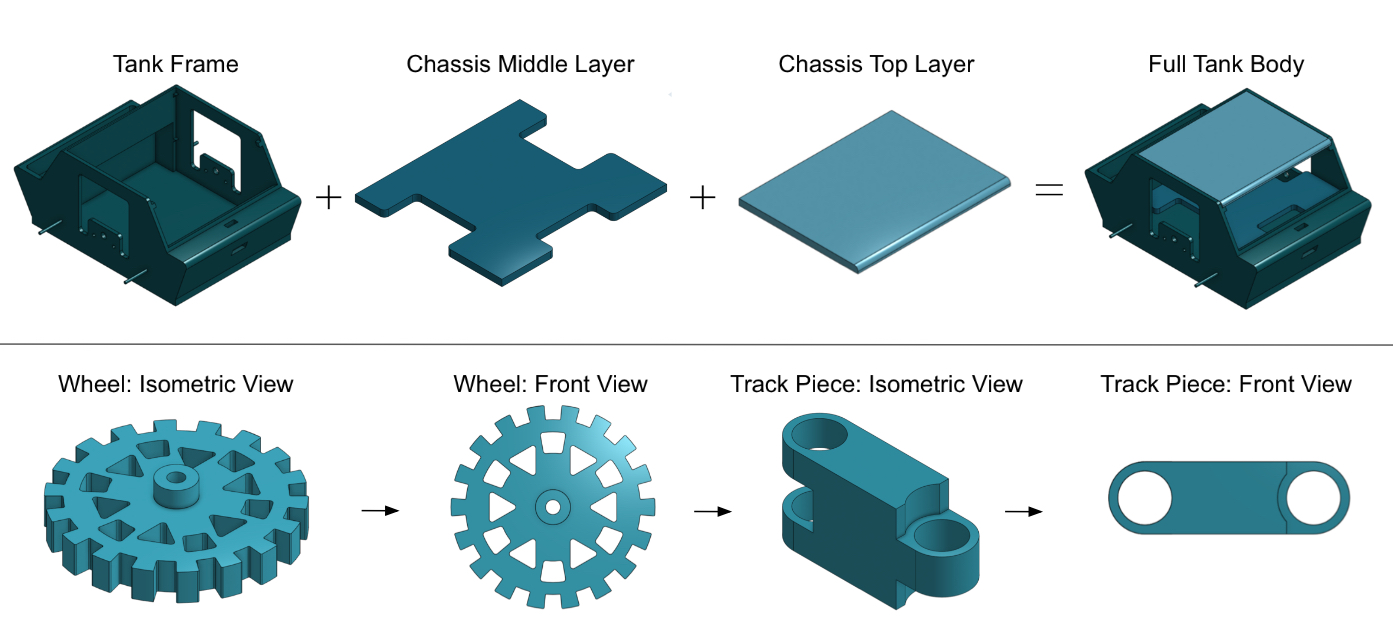
3D Modeling Process: To create the tank body, Cayden worked on CAD modeling the wheels and treads using AUTODESK Inventor while I created the chassis on Onshape. To create the chassis, I first created an 8 inch by 10 inch base to work with. I used additive and subtractive processes to mold the digital version of the chassis. Once I established the frame of the chassis, I designed two separate parts that would serve as layers inside the chassis. I created multiple ledges and layers to allow the tank to have different places to keep the parts separate and distribute the weight. We planned for the Arduino Board and its components to be on the middle layer and the battery to be on the bottom layer. Once each part was finalized, I created an assembly to confirm that each would fit. Each layer successfully fits into the chassis frame. I have included images of both the chassis and wheels/treads below:
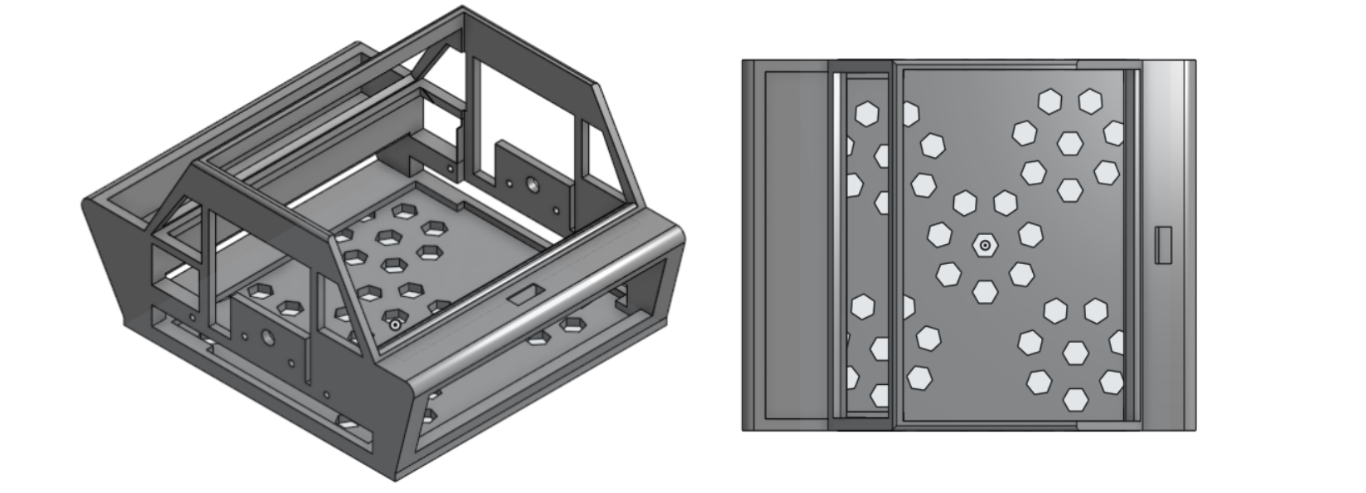
Tank Chassis Process: After all CAD models were finalized, we decided we would work on 3D printing each piece. When slicing the tank, I realized the dimensions of the tank were too large for the Mini Prusa + printers. To reduce the size, I altered the dimensions of the tank on Onshape. Although reducing the size of the tank was effective, the amount of filament necessary to print the tank was excessive and expensive. I attempted to cut shapes into the tank to reduce the amount of filament used, which can be seen below:
While this design used less filament, the printing time was estimated to be around 30 hours. This chassis was an option, but it was not time-efficient. I decided against this option because Cayden and I needed a tank body to test our robot on, and there were limited 3D printers at the time. By reverting the CAD design to its original state, I made a trip to Walmart to buy the materials necessary to recreate this model with cardboard. After collecting my materials, I measured and drew each part of the tank on the cardboard. I used a boxcutter to cut each part and a hot glue gun to combine everything. This process took around two hours and the final result can be seen below:
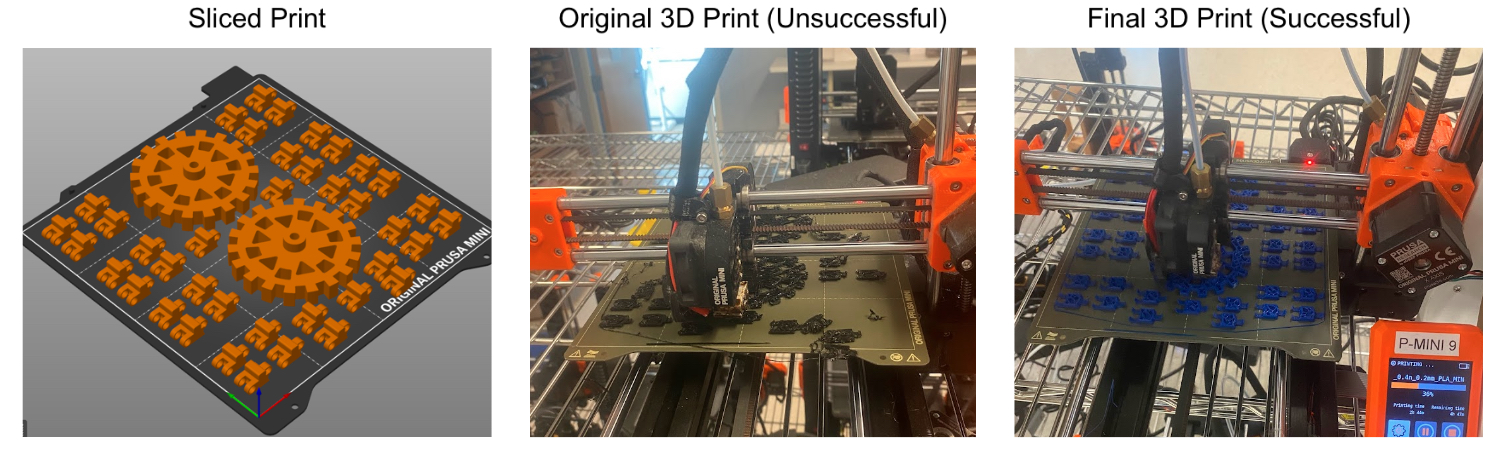
Tank Tread Process: To create the tread, Cayden and I 3D printed each track piece individually. We planned to print the same file twice, which contained 40 track pieces and two wheels each. During our first print, the majority of the pieces were usable, but around ten pieces were misshaped, which caused them to be unusable. During our second print, there were issues with the printer which caused the print to fail. The printer had not properly ground the filament, causing the print to stop midway. I was advised by an associate in the Makerspace to switch printers, which helped the print drastically. I also decided to lower the temperature by 10 degrees Celsius. During the last reprint, all pieces printed perfectly. I have included images of the sliced print, original print, and final print below:
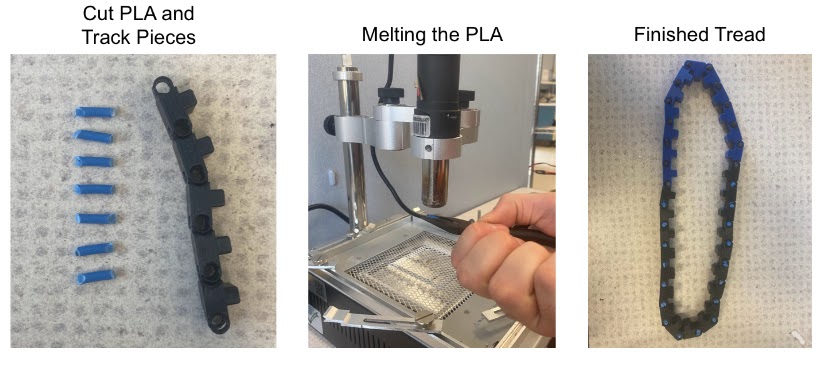
After everything was printed, we had four wheels and 80 track pieces. To connect each track piece, we cut and melt PLA filament using the hot air on the soldering station. We cut two small pieces of PLA per track piece and melted them together. After melting the PLA, we used pliers to insert them between each piece. This process took around four hours for each tread. Each tread had 30 track pieces each. Located below are images of the process:
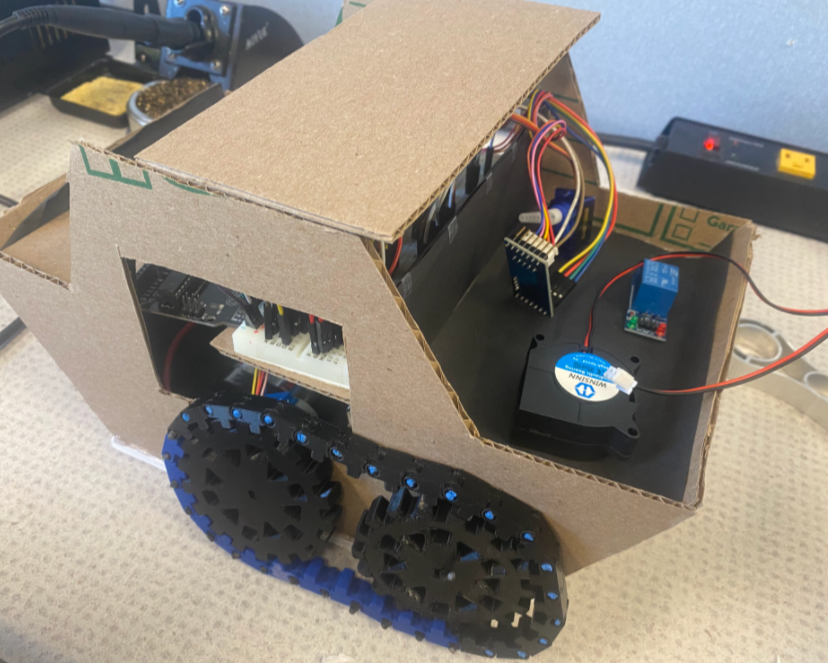
Original Tank Design: Once everything was ready, we put the pieces together and set up the robot. While each part fit correctly in the robot, we realized there was too much weight for the tank to move, and the motors were not strong enough to pull the tank forward. I have included a picture and a link to a YouTube short displaying the original test and issue below. In the short, the motors are clicking and shaking because they are attempting to pull the robot forward, but they are not strong enough.
https://youtube.com/shorts/aUPN24ir8Qo?feature=shared
Revised Tank Design: After identifying the issues, we decided to cut off any excess cardboard to reduce the overall weight of the tank. After removing as much excess weight as possible, we tested the robot again. The motors continued to have trouble pulling the robot forward. Proceeding with our project, we decided to take off the treads and use rubber bands around each wheel instead. We also removed the front wheels of the robot that did not actively have a motor because their purpose was to support the treads. Doing so allowed the robot to move, as shown in the image and YouTube video. We also altered the orientation of the robot and added weight to the back for balance.
https://youtu.be/FyvNsDlen68?feature=shared
Tank Issue: Right after we finalized the robot to ensure everything would move, we noticed a massive problem. The left wheel of the tank had melted. Throughout testing, the temperature of the stepper motor increased. With the motor being very hot, The inside of the wheel connected to the motor started to melt. Because the issue was inside the hub, we did not notice until the wheel fell off the robot. While the hub of the wheel was originally a thin slit, it melted into a circle. During this time, the Makerspace was closed, and we did not have enough time to reprint the wheel. Due to the middle part of the wheel that fits around the stepper motor no longer being the correct shape, it prevented us from proceeding with our project. I have included an image of the melted wheel below: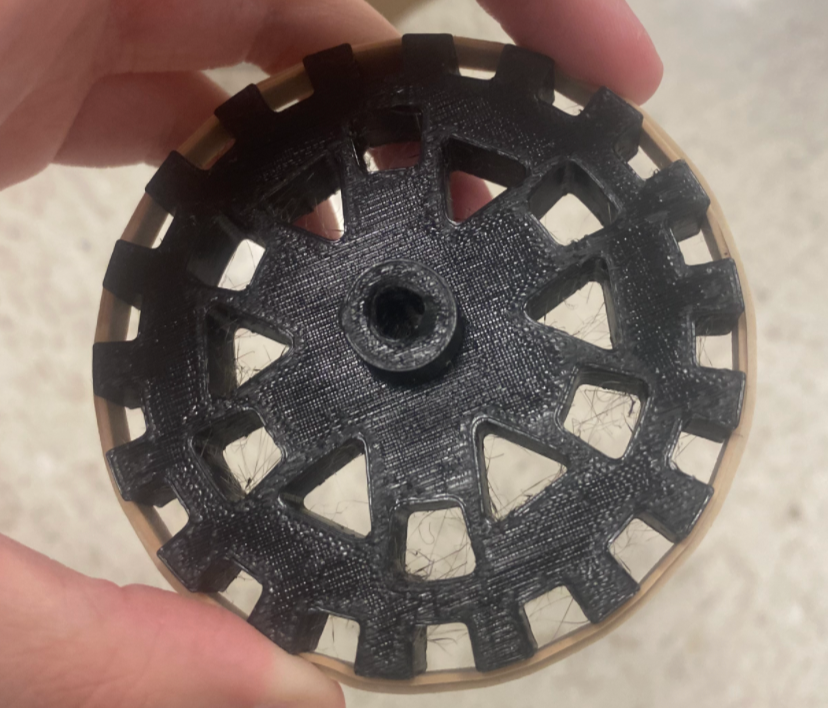
Conclusion: Our robot was unable to complete its intended task of navigating a maze and extinguishing the fire. While Cayden and I were not able to complete our project, we gained knowledge through the use of the engineering design process. The engineering design process focuses on brainstorming, testing designs, creating iterations, and thinking outside of the box. We learned the importance of revising original designs and finding new solutions when the first solution is unsuccessful. Alongside making iterations, we were able to work on essential engineering skills such as coding, CAD modeling, wiring, 3D printing, and communicating as a team. This project helped me understand how critical thinking and decision-making are vital in engineering.
Future Improvements: If I had time to improve or redo this design, I would change the material of the tank and tread. Instead of using cardboard, I would try to 3D print a chassis that would serve the same purpose as the cardboard body but limit the amount of filament needed to print. 3D printing a chassis would help create more accurate dimensions and build-in mounts. Alongside the chassis, I would try to print the tread in a flexible filament that prints the track pieces already connected. Using a flexible filament may help limit the friction and quicken the process. The last part of the project I would change is how we managed time. We spent a large amount of time connecting the track pieces and setting up the robot, which limited the time we could test and finalize the design and ensure its success.
Recent Comments