Hydraulic Generator Honors Project:
Partner Alex Judson’s Portfolio
This hydraulic generator design serves as an Honors Project Fall 2023 for Engr 200, Phys 231, and EE 201 with partner Alexzander Judson.
Objective: Design a device that powers a mini DC generator by harvesting the kinetic energy of running water and compare the actual voltage produced by the generator to the expected voltage production over a series of resistors. Make the device to be portable and to be water tight and functional in a variety of different settings, from natural flowing water to pressurized sources. Work effectively with a partner to design and produce the product.
Design Brainstorming:
Sketch 1: Our first idea was to have the water wheel anchored by one generator housing

Sketch 2: Anchor the generator housing in the center with two water wheels on each side of the housing
Sketch 3: Cone on the front of a tube creates a funnel that feeds a turbine
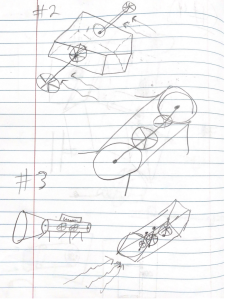
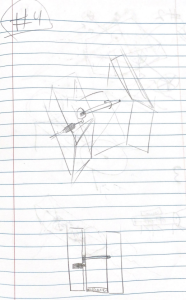
Sketch 4: Two housings with flanges on the front direct water toward the wheel, one housing acts as an weighted anchor and the other houses the generator

We decided to use the fourth design idea for our project. We ordered mini DC 3v generators and decided to use brass axel rods and bearings from the University Makers Space as the premanufactured parts of our design.
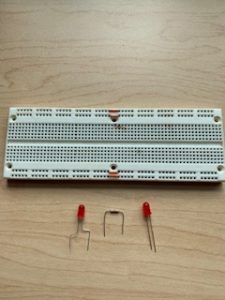
Premanufactured Parts:
- 3V DC Generator
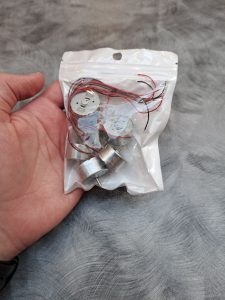
- Ball Bearing
- Brass Axel Rod
- Mini Bread Board
- Resistors / LED
3-D Modeled Parts:
- Frame
- Gear wall mount
- Generator mount
- Axel Key
- Water Wheel
- Cover plate
- Frame Rods
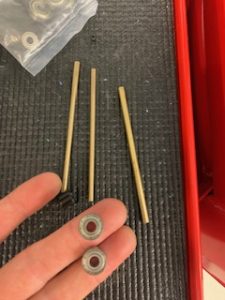
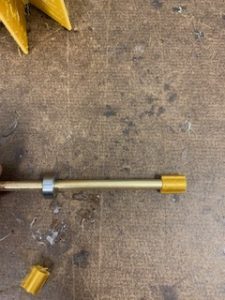
Axel and Bearing:
In order to fit the bearings on the brass axels I had to file down one side of the axel. I put the brass rods into a drill and clamped a file to the edge of a table and filed down one side to make the bearings fit both axels snugly at the same length. This took some trial and error and fine tuning but I was able to get both bearings to a tight fit at the same distance from the end of the axel rod. Making them fit at the same distance was the most challenging part, but with some patience and luck I was able to make them nearly identical.


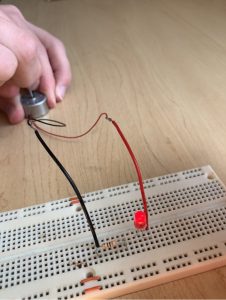
Proof the generator Works and First Concerns:
When our generators were delivered, the first thing we did was test their functionality with an LED. As the picture displays, everything functioned as expected but there was a slight concern over the speed of rotation the generator required in order to actually light the LED. Though we were just spinning it by hand to test it out, it seemed like it was having a hard time producing enough power to light the LED. There was some concern at this point as to whether or not our wheel would actually be able to produce a rate of rotation fast enough to power to light the LED, but we knew that from Alex’s gear box we would have a bit of a buffer because of the*2.5 gear ratio he was implementing into our design.
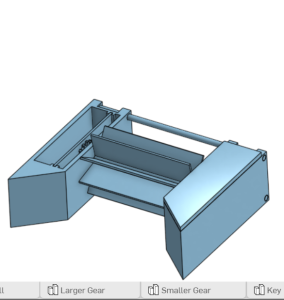
Final Frame Design: Alex designed our frame I modified it to match the bearing and axel rods, we divided the remainder of our parts and work flow based on the internal components and external components.
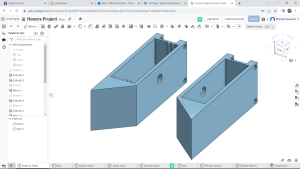
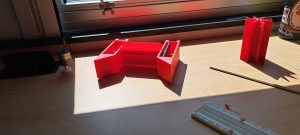
First Frame Print: The first frame print was sized well and the bearing fittings in the wall were the right size. However, when I added the frame rod assembly in the back, I failed to extrude the entire frame out so the rod mounts were just floating. You can see that Alex fixed this in our final design and added fittings for another frame rod at the bottom of the frame. Also seen are the tabs built into the inside of the frame where the gear box assembly fits into place.

Included-Alex Judson’s first gear box print-
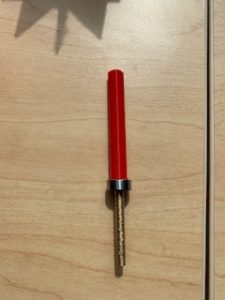
Key Design: The key is made to fit tightly around the axel rod and to marry to the water wheel. It is a hollow tube with two rails on the top and bottom of it. The idea of using the key is to make the unit easy to dissemble so you could transport it and potentially use the product out in the real world, in situations where you wouldn’t have access to power to charge your phone or a flashlight for example. Making the product easy to transport was a key element of our design. Making it practical for traveling or camping was the original motivating idea for the product so we tried to keep that principle part of our design as the project advanced.
: 
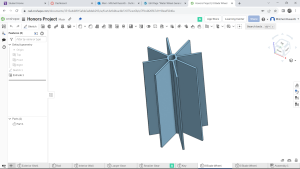
Wheel: I chose to design 8 blade wheel to maximize the usable surface area for water contact on each blade. 8 blades was the most I could reasonably print on one wheel for the size and functional design of our generator. I chose not to cup the blades because we have designed it to operate in low head streams meaning that the water would actually be making contact with the bottom of the wheel so there would be no way to effectively catch the water with the wheel and the additional material would just make it harder to rotate.
Print 1: The first wheel and key print failed when the wheel was roughly 80% done because the printer ran out of filament. this was the first major learning experience of this project for me. Before starting a print, ensure that there is enough material available to finish the print. This was unfortunate but ultimately didn’t impact the project flow because the sizing of the key was slightly off. The main of error was too small for my key to fit around the axel rod. Short pieces would fit but the key would break as soon as we tried to press it on. The key did fit into the wheel, but the same issue occurred, it would break when you started to press it in because it was too tight.


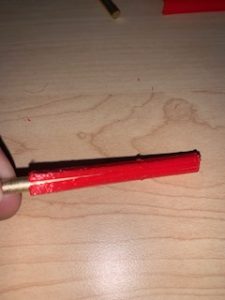
Print 2: The second Wheel and Key I made a few adjustments to the margins of tolerance to try and remedy the sizing issues from the first print. I made some other adjustments in the slicer that caused problems with this print. First I changed the printing orientation of the key to print horizontally, and I increased the layer height of this print to try and make it print faster. These changes ended up being major mistakes, as the pictures show the increased layer height threw off my new margins and the key did not fit into the wheel at all. The horizontal printing orientation of the key caused it to be weaker across the length of the tube. When I tried to press fit it over the axel, it fractured along the long ways as opposed to the 1st key print which was oriented vertically and broke horizontally when I tried to press fit it (shown in the last picture).


Third Times The Charm: Using what I learned about the impact of margins/tolerance, layer height, and orientation on the quality and accuracy of a print I was able to put all these together for a successful third print. The key fit the axel perfectly and married to the wheel without any trouble or pressure. To ensure a successful print the key intentionally fit more loosely to the axel on the third attempt, so we used super glue to attach them together.

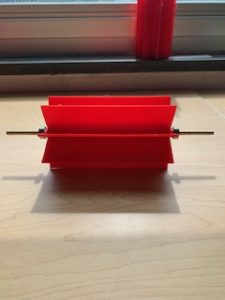
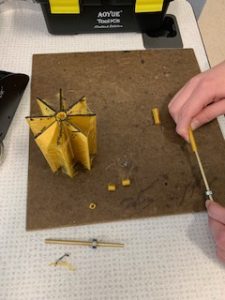
Rough Assembly: At this point we were able to preform our first rough assembly. All the outside components were fitting together and were properly married to our first frame, this allowed my partner Alex to proceed with tuning the gear box and generator mount to fit accordingly into our frame.
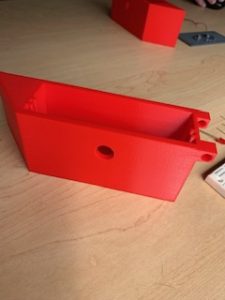
Final Frame Print:
I learned after a couple of failed printing attempts for other parts that a big factor in the quality of a print has to do with the layer height, printing thinner layers provides more detail in the product. The final frame print came out clean apart from some warping on the front corner of our funnel and the back frame rod assembly, but the critical component fittings all printed cleanly.

Final Assembly:
Voltage Across: 510 ohm, 470ohm, and 330ohm:
Actual 510: 503 ohm : 1.4% error : Voltage : 900mV
Actual 470: 465 ohm : 1.1% error : Voltage : 800mV
Actual 300: 298 ohm : 0.67% error: : Voltage : 500 mV
Conclusion:
Electricity generation is a challenging task. We were unable to produce enough power from water flow alone to display our product’s function. When we rotated the generator by hand, the LED would flicker and produce light. However, even powering the generator by hand there was very little usable voltage produced. Although the product did not function exactly how we had hoped, it was a great learning experience. Processing design iterations, 3D modeling and printing, coordinating an involved project with a team mate, and practicing the practical application of power generation were all productive take aways from this honors project.
Recent Comments