Design Process
I started with a base project that I found online. I found it on Thingiverse, by a user who goes by the name Blayder. I was able to get a parts list and it helped me hit the ground running. I added a Piazzo and an Infrared Sensor to enhance the design.
List of Parts
- 2x Tower Pro MG90S
- 1x Arduino Nano
- 1x 9V battery (may need more, batteries can die quickly)
- 1x 3mm rod ~35 mm long (I used a small piece of filament)
- 1x 2k Ohm resistor
- 4x M3x12 Screws
- 2x M3 Threaded Inserts for 3D Prints
- 2x SPST switch (or replace one for a flat Switch)
- Sharp IR Sensor (GP2Y0A41SK0F)
- Piazzo
- Wires
3-D Printing
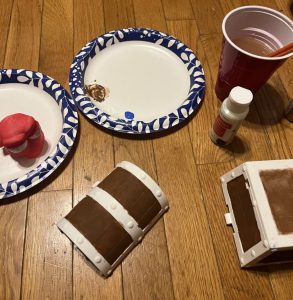
I printed off the original parts provided in the base project and pained the face and box. Painting the face proved to be futile, but that will be explained later.
Changes
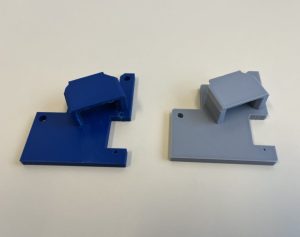
I had to adjust the dimensions on the structure piece below. It holds both servos in place, and the space that held larger arm was too tight for the servo. I used Tinkercad to enlarge the space slightly, and then reprinted the piece. The blue part of the left is the original, while the gray part on the right was the modified structure piece.

I also had to adjust the size of the arm opening the lid of the chest. The original was too small and my second print was too large. My final print was about 55 mm tall.
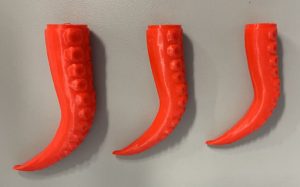
The switch cover provided was too small for the switch that I bought. It is the cover farthest to the left. The other two were drawn and printed by me. I ultimately decided to go with the design in the middle.

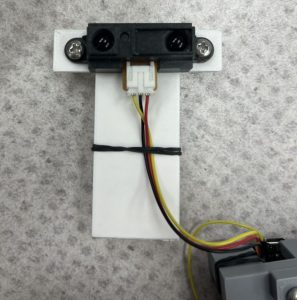
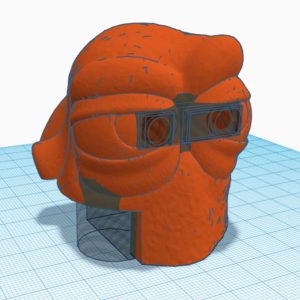
I added an infrared sensor into the design. In doing so, I had to set it up facing outwards unobstructed while also fitting everything else in the box. The first image was my first attempt. I had planned to place the sensor behind the head and larger arm. It was awkward and had difficulty fitting into the box. The second image shows my final design. In that design, I cut out space for the infrared sensor inside of the octopus’s head (Hank). This worked because I was able to fit the sensor into the box, unobstructed, without being awkward. In the end, I printed two versions (three including the one I originally painted) because the first version had too tight of a space to fit the infrared sensor.
Wiring
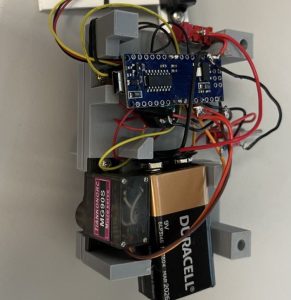
When I first wired everything together, as shown in image one, it was clear that it was not going to fit into the box. The wires were too long and would have taken up too much space. I had to go back and rewire it by shortening the wires. This proved to be difficult; as shown in images two and three, the wires kept breaking. I would leave the lab and realize that the wire had disconnected a few hours later. The fourth image shows where I was able to condense all of my wiring as well as add a piazzo and an infrared sensor. The final image is a snippet of the simulated circuit, but I have added the link to Tinkercad for a clearer image.



Assembling
When assembling the components and pieces I had to ensure that everything fit into the box. I first situated the structure piece that held the servos, Nano, and the wires. I put the switch through the hole in the box, and then screwed a nut and washer on the end to hold it in place. Next, I attached both 3-D printed arms to the servos. Then, I set the octopus head (Hank) into the box.
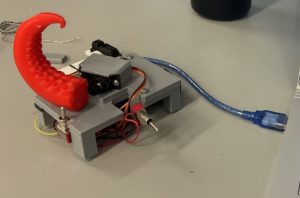
When I was testing I had to keep removing the entire support structure. I would recommend getting a cord that fits through the preset hole, or making the hole larger. I also found that I went through a lot of 9 volt batteries because I left them plugged up. I made it so that the cord extended out of the box to make changing the battery, or unplugging it, easier.
Coding
In the base project there was Arduino code provided, but I had trouble understanding the author’s style, so I opted to start from scratch. I imagine that the code stayed relatively similar with the exception that I added the infrared sensor and the piazzo.
Finished Product
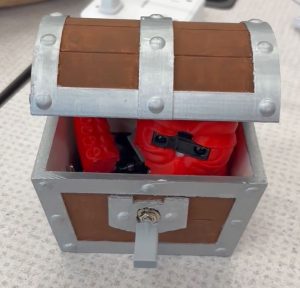
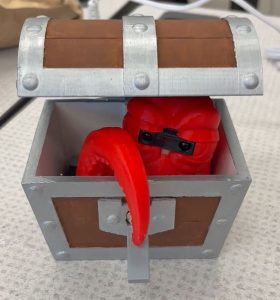
I loved making this project. It helped develop my skills with the Arduino language and components. It was fun to make and the end result was worth the time. If I were to remake the project I would use stronger wires and I would make sure that I could download code without removing the Nano from the box.



Recent Comments