Reference link to the drawing used.
Below are instruction on how to Import and Scale an image on OnShape for a beginner.
How to Import an image in OnShape.
- Search the web for the image you would like to use to design the device. (Choose one that is not clustered with lots of dimensions/lines so that you don’t get confused).
- Right click on the image and select “Save image as” in order to download it to your computer.
- Give it a meaningful title and save the image to desktop or documents, whichever you prefer.
- Then click the save button at the bottom right-hand corner.
- Go to OnShape and click Create.

- You’ll then be asked to name the document; afterwards select create.
- Click ‘Sketch’

- Then select the plane you would like to work on (I selected the Front plane for this particular design).
- Select the Icon below.

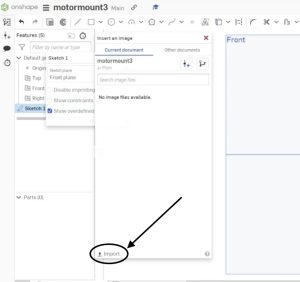
- Click ‘insert image’.
- Select import at the very bottom.

- Select your image from your files.
- Now that you have uploaded the image to OnShape; select it.

14. Then use your mouse to draw the image as large as you want it to be, then click escape.
How to Scale an image in OnShape
- Ensure that you are using the unit you intended by clicking the icon in the screenshot below.

- Click Workspace Units.
- Under ‘Default length unit’ select the preferred unit.
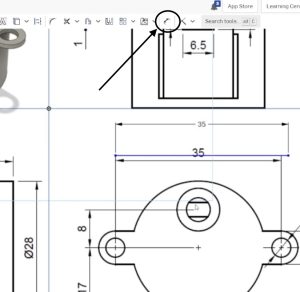
- Create a line by selecting the line symbol and dragging your mouse from one point to the next on the plane you previously chose.

- Before clicking escape, type the length you would like (eg. 35mm) so that it corresponds with one of the line dimensions shown in the image.
- Click the dimension icon and select the sides of the image that make up its width (these are the two vertical lines of the rectangle outlining the image).

- Hold down on the ‘down arrow’ or ‘up arrow’ on your keyboard (while the dimension is highlighted) and shrink the image until the line you created and the line you used the dimensions of, from the image, mimic each other in length. (This will be noticeable if you place the line directly above what you are trying to replicate from the image).

- If you have gotten this far your drawing is successfully scaled and you can continue to mimic the dimensions.
Additional information necessary for the printing process
Printer: Original Prusa i3 MK3
Plastic: Prusament PLA
Slicer Settings: 0.15mm QUALITY
3D Printed Design with Stepper Motor mounted in place.


Recent Comments