Fire Fighting Robot Project

The Final Design
For the Final Project of Engineering 199 led by Professor Adam Harris, the entire class had to design a Firefighting robot that could complete a simple maze and blow out a fire. This required us to use multiple other assignments done throughout the semester which are posted here on my blog.
We were placed in groups to carry out the project and my group members included Joshua Chandler and Helen Hester. They too created blogs based on our robot, the links are attached below.
Joshua’s Blog: https://portfolio.wcu.edu/jlchandler4/2022/12/16/firefighting-robot-project/
Helen’s Blog: https://portfolio.wcu.edu/hjhester1/?p=551&preview=true
3D Printing Portion
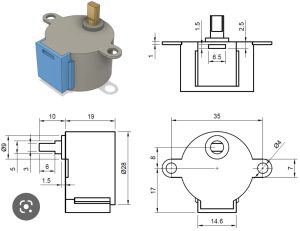
To design this project our professor had us create a motor mount using an image from google published by cookie robotics with dimensions that matched our motor mount. This was later used to mount our stepper motor and our wheel to the actual robot. It was afterwards that we designed our hub and wheel that was previously mentioned. This tasked required that each person created multiple iterations of a hub that would have a good fit onto the shaft of the stepper motor.

I personally had to make three separate iterations until the goal was achieved since the first hub was too exact and the second was done on a not so precise 3D printer.

The Three Hub Iterations
When the dimensions for the hub was established a wheel was designed around it and the final product was printed.
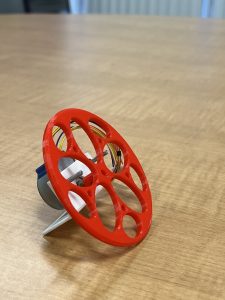
My Wheel
In addition to the traditional wheel was an Omi-Wheel Holder; its design was provided by our professor and my group member Joshua was the one who had printed it.
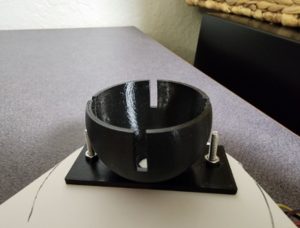
The Omi-Wheel Holder
The only downside of having three group members is that everyone’s hardware could not be incorporated into the robot as it was simply not needed. I was also the last to have my wheel printed due to a hectic training schedule as I am an athlete. Besides that however I really enjoyed working with these intelligent individuals.
Assembling the Robot
We assembled the robot so that the code be tested every time progress was made but as it came down to creating the final design a few adjustments had to me made. For one, our professor gave us a battery holder that would aid in powering the robot instead of the computer that would obstruct motion. However the holder had the wrong connection attached to it so I had to solder it to the correct one so that it could be plugged into the Arduino. All other components were given to each member of the class in our Arduino kit. This includes:
- The breadboard that allowed for multiple 5V and ground pins
- The Ultrasonic Sensor which read/detected distance
- The flame sensor that detect the flame
- The relay module
- The fan
- Multiple wires
- Stepper motors
- Wheels (both types)
- Rubber Band for a better grip
- The Arduino Uno
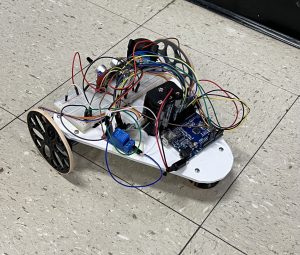
The Robot Assembled
https://youtu.be/psHWBDe2pC0 – Short clip showing initial progress.
We were somewhat prepared for the programming segment as throughout the semester we used the same devices in various assignments. To operate the stepper motor we needed to calculate the steps for each wheel so that the two could be synced when in motion, this was done by Joshua.
The general format of the code to be executed was created by our professor with the input of my classmates along the way. Joshua also took initiative here as he was the member who wrote the majority of the code. He came upon issue along the way which he explains in his blog, causing him to have to do multiple iterations of the code that Helen aided in developing. After overcoming this hurdle is when it was decided that we wanted our robot to be able to solve both a left-hand maze (solve the maze using left turns) and right-hand maze (solve the maze essentially using right turns).
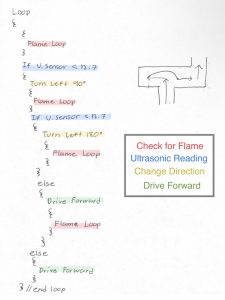 Simplified Code
Coding is an area I have little experience in and I’m currently on the verge of improving that skill. I gave little suggestions as best as I could when it came on to values for the sensors (ultrasonic and flame) and reminded them of small things they may have missed or forgotten to correct before uploading the code to the Arduino again.
Conclusion
I must say however, that I have indeed learnt a lot as my group members explained what it is the code was doing in layman terms. I got to see all the seemingly separate assignments work as one to create a masterpiece. The big picture made the project seem a bit daunting but when you approach it in sections it seemed a lot simpler. Of course I would’ve hoped to be of a lot more help but I would’ve only slowed them down when time was already limited. If allowed more time I would’ve loved to add a victory song so that users could be certain that the task is completed instead of having to watch the robot constantly with uncertainty.
The Demo

Trackbacks/Pingbacks