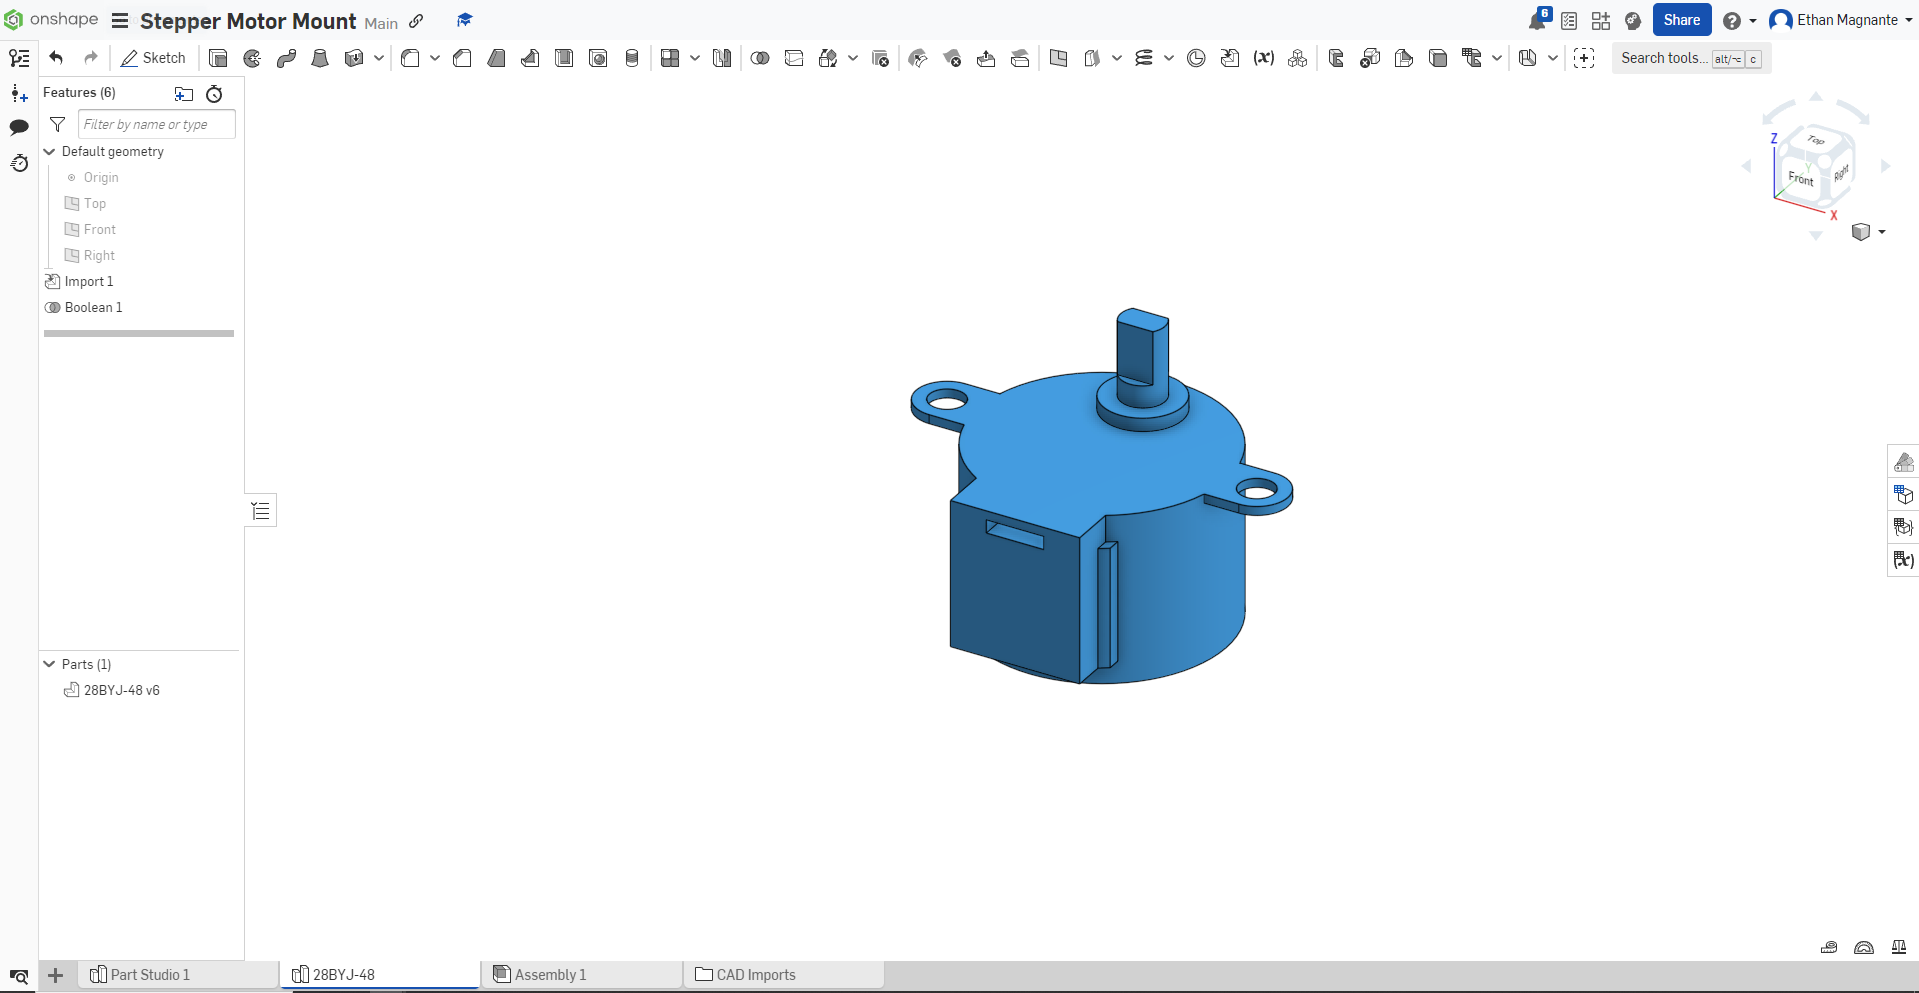
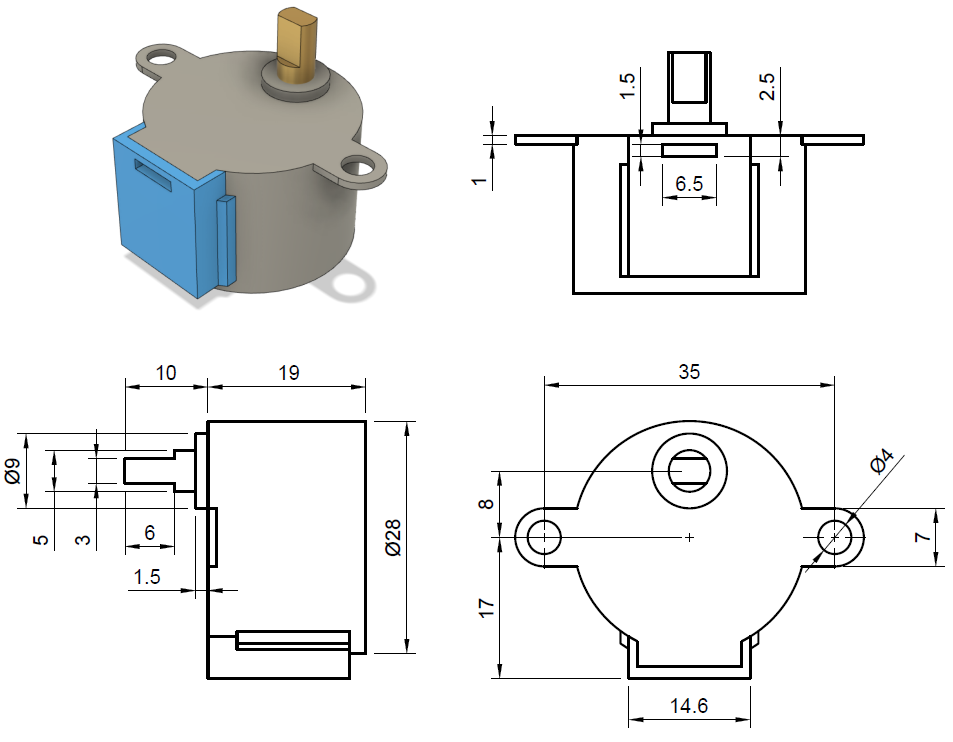
In lieu of the final project for the ENGR 199 class that I am a part of, I was given the task of designing a chassis mount for a 28BYJ-48 Stepper Motor, which would be used to help power the wheels of the final project that I will be building. To begin this process, I first had to have some form of import/reference to what the actual design of the stepper motor would look like, so I imported an already (to-scale) stepper motor from the website https://cookierobotics.com/042/ into a 3D CAD software called OnShape (web-based & free CAD software). The design that was used is shown in the below picture (left is the imported design, right is the design file blueprint/drawing):
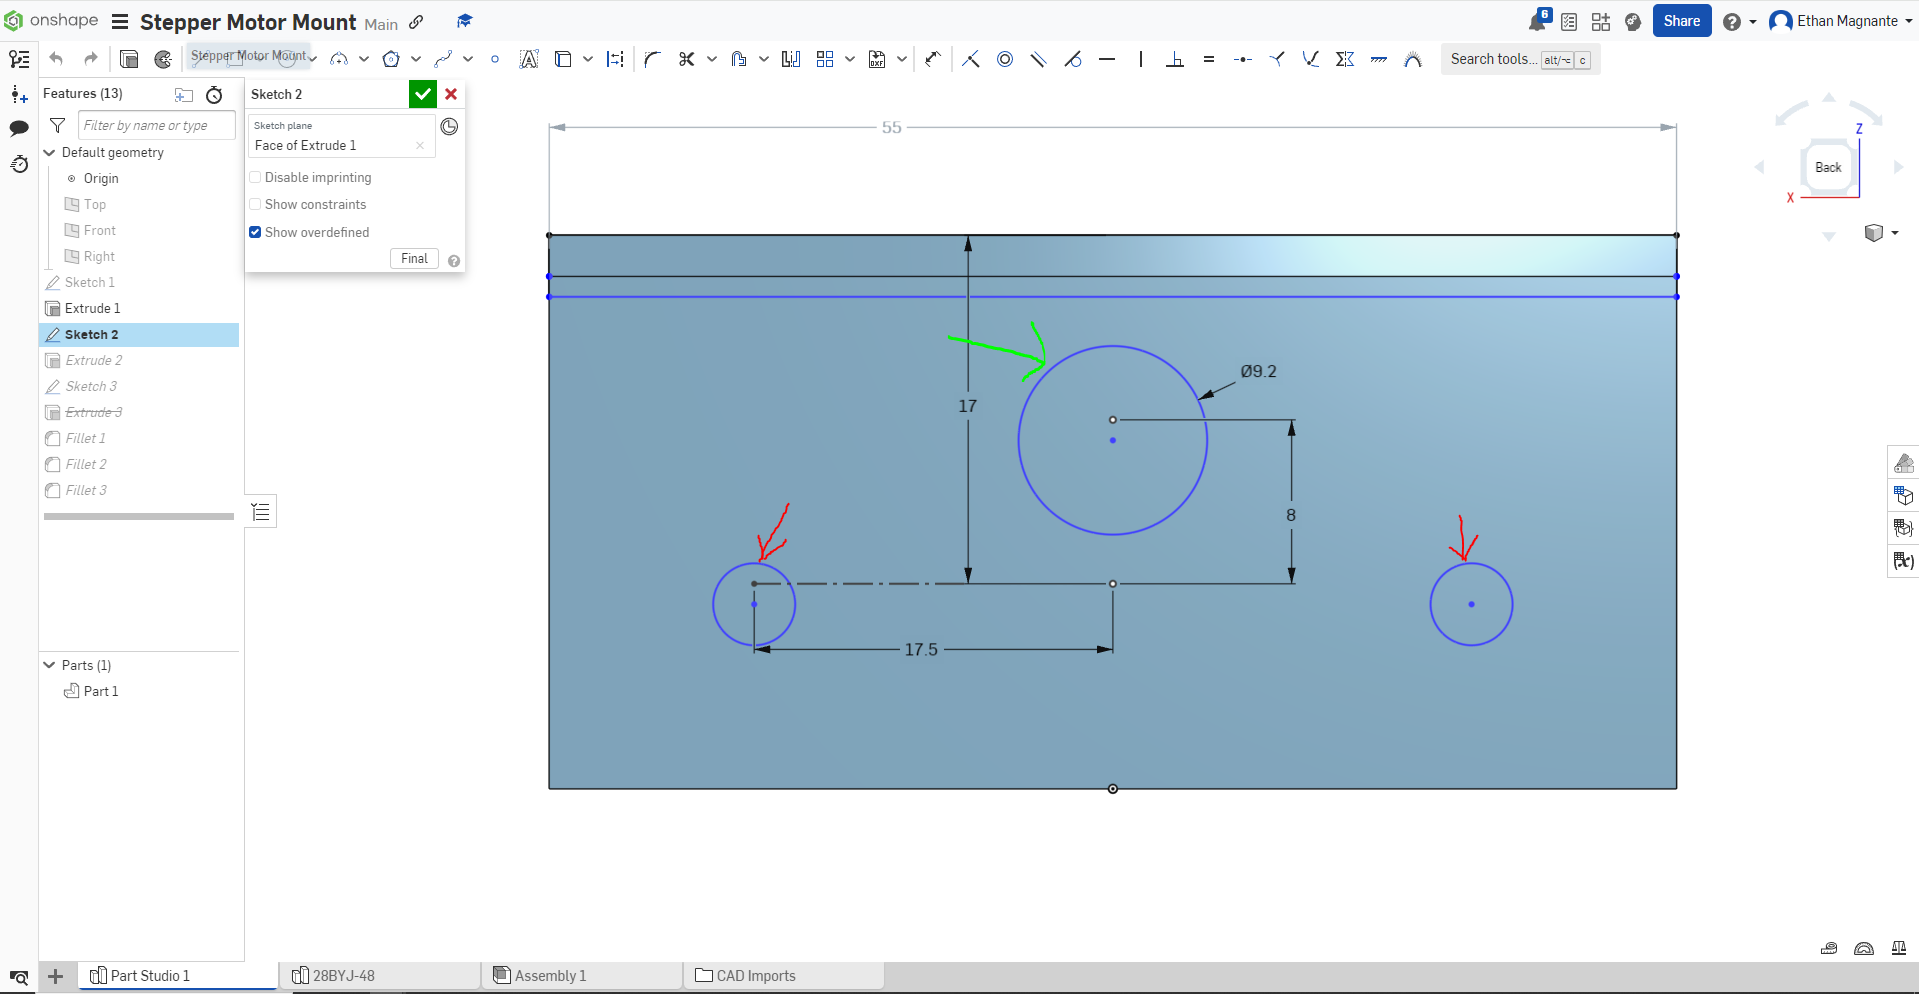
After importing the file into Onshape, I then had to actually design the motor mount that would fit on the chassis. I did so by cross-referencing the above blueprint for the stepper motor and made wholes at the points that my screws would fit in to hold the motor to the actual mount, as well as design a bigger whole that would allow the actual shaft of the motor to poke out so that I can harness its movement to move my robot. The design of this can be seen in the below sketch image (with the screw holes being the circles with red arrows pointing to them, and the motor shaft hole being the circle with a green arrow pointing to it):
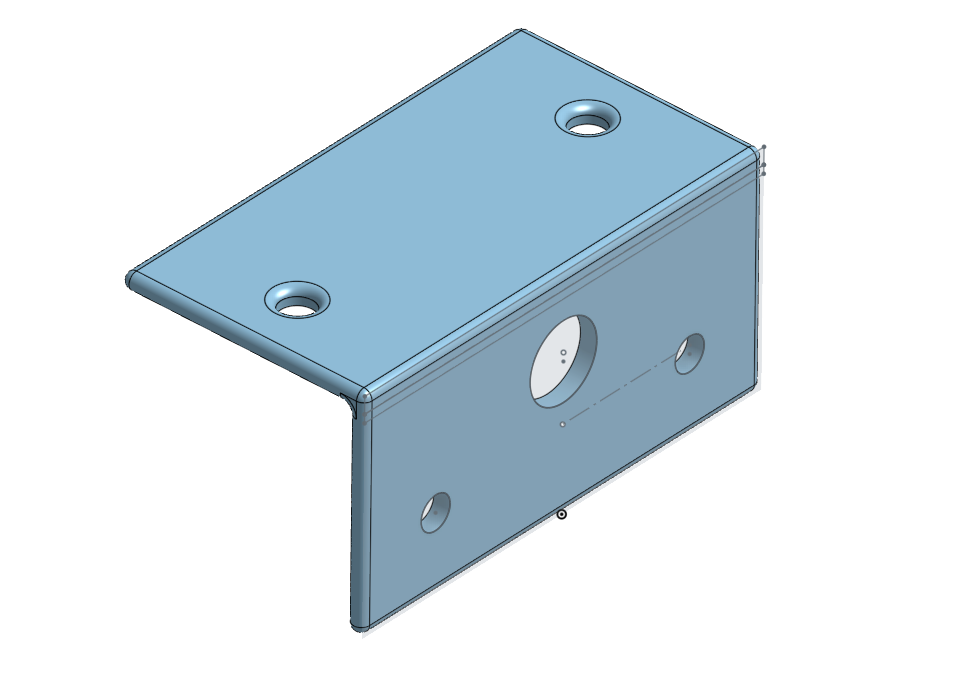
I then also needed to design the part of this piece to be able to adhere to the chassis of my actual robot, so I designed another face of this piece to have two screw holes as well so that it can tighten itself to the chassis of the robot. The design for this can be seen below, as well as the full piece of the motor mount:

I then exported this file as a .3mf file in order to be used properly for 3D printing. Once the export was complete, I imported the .3mf file into another software called Prusa-slicer which creates a g-code (code that 3D printers read to actually do 3D printing instructions) that I exported onto a thumb drive to be directly connected to a 3D printer. The printer that I used had the following specifications:
Printer: Original Prusa MINI
Filament: Generic PLA
Print Settings: 0.15mm SPEED
Infill: 15%
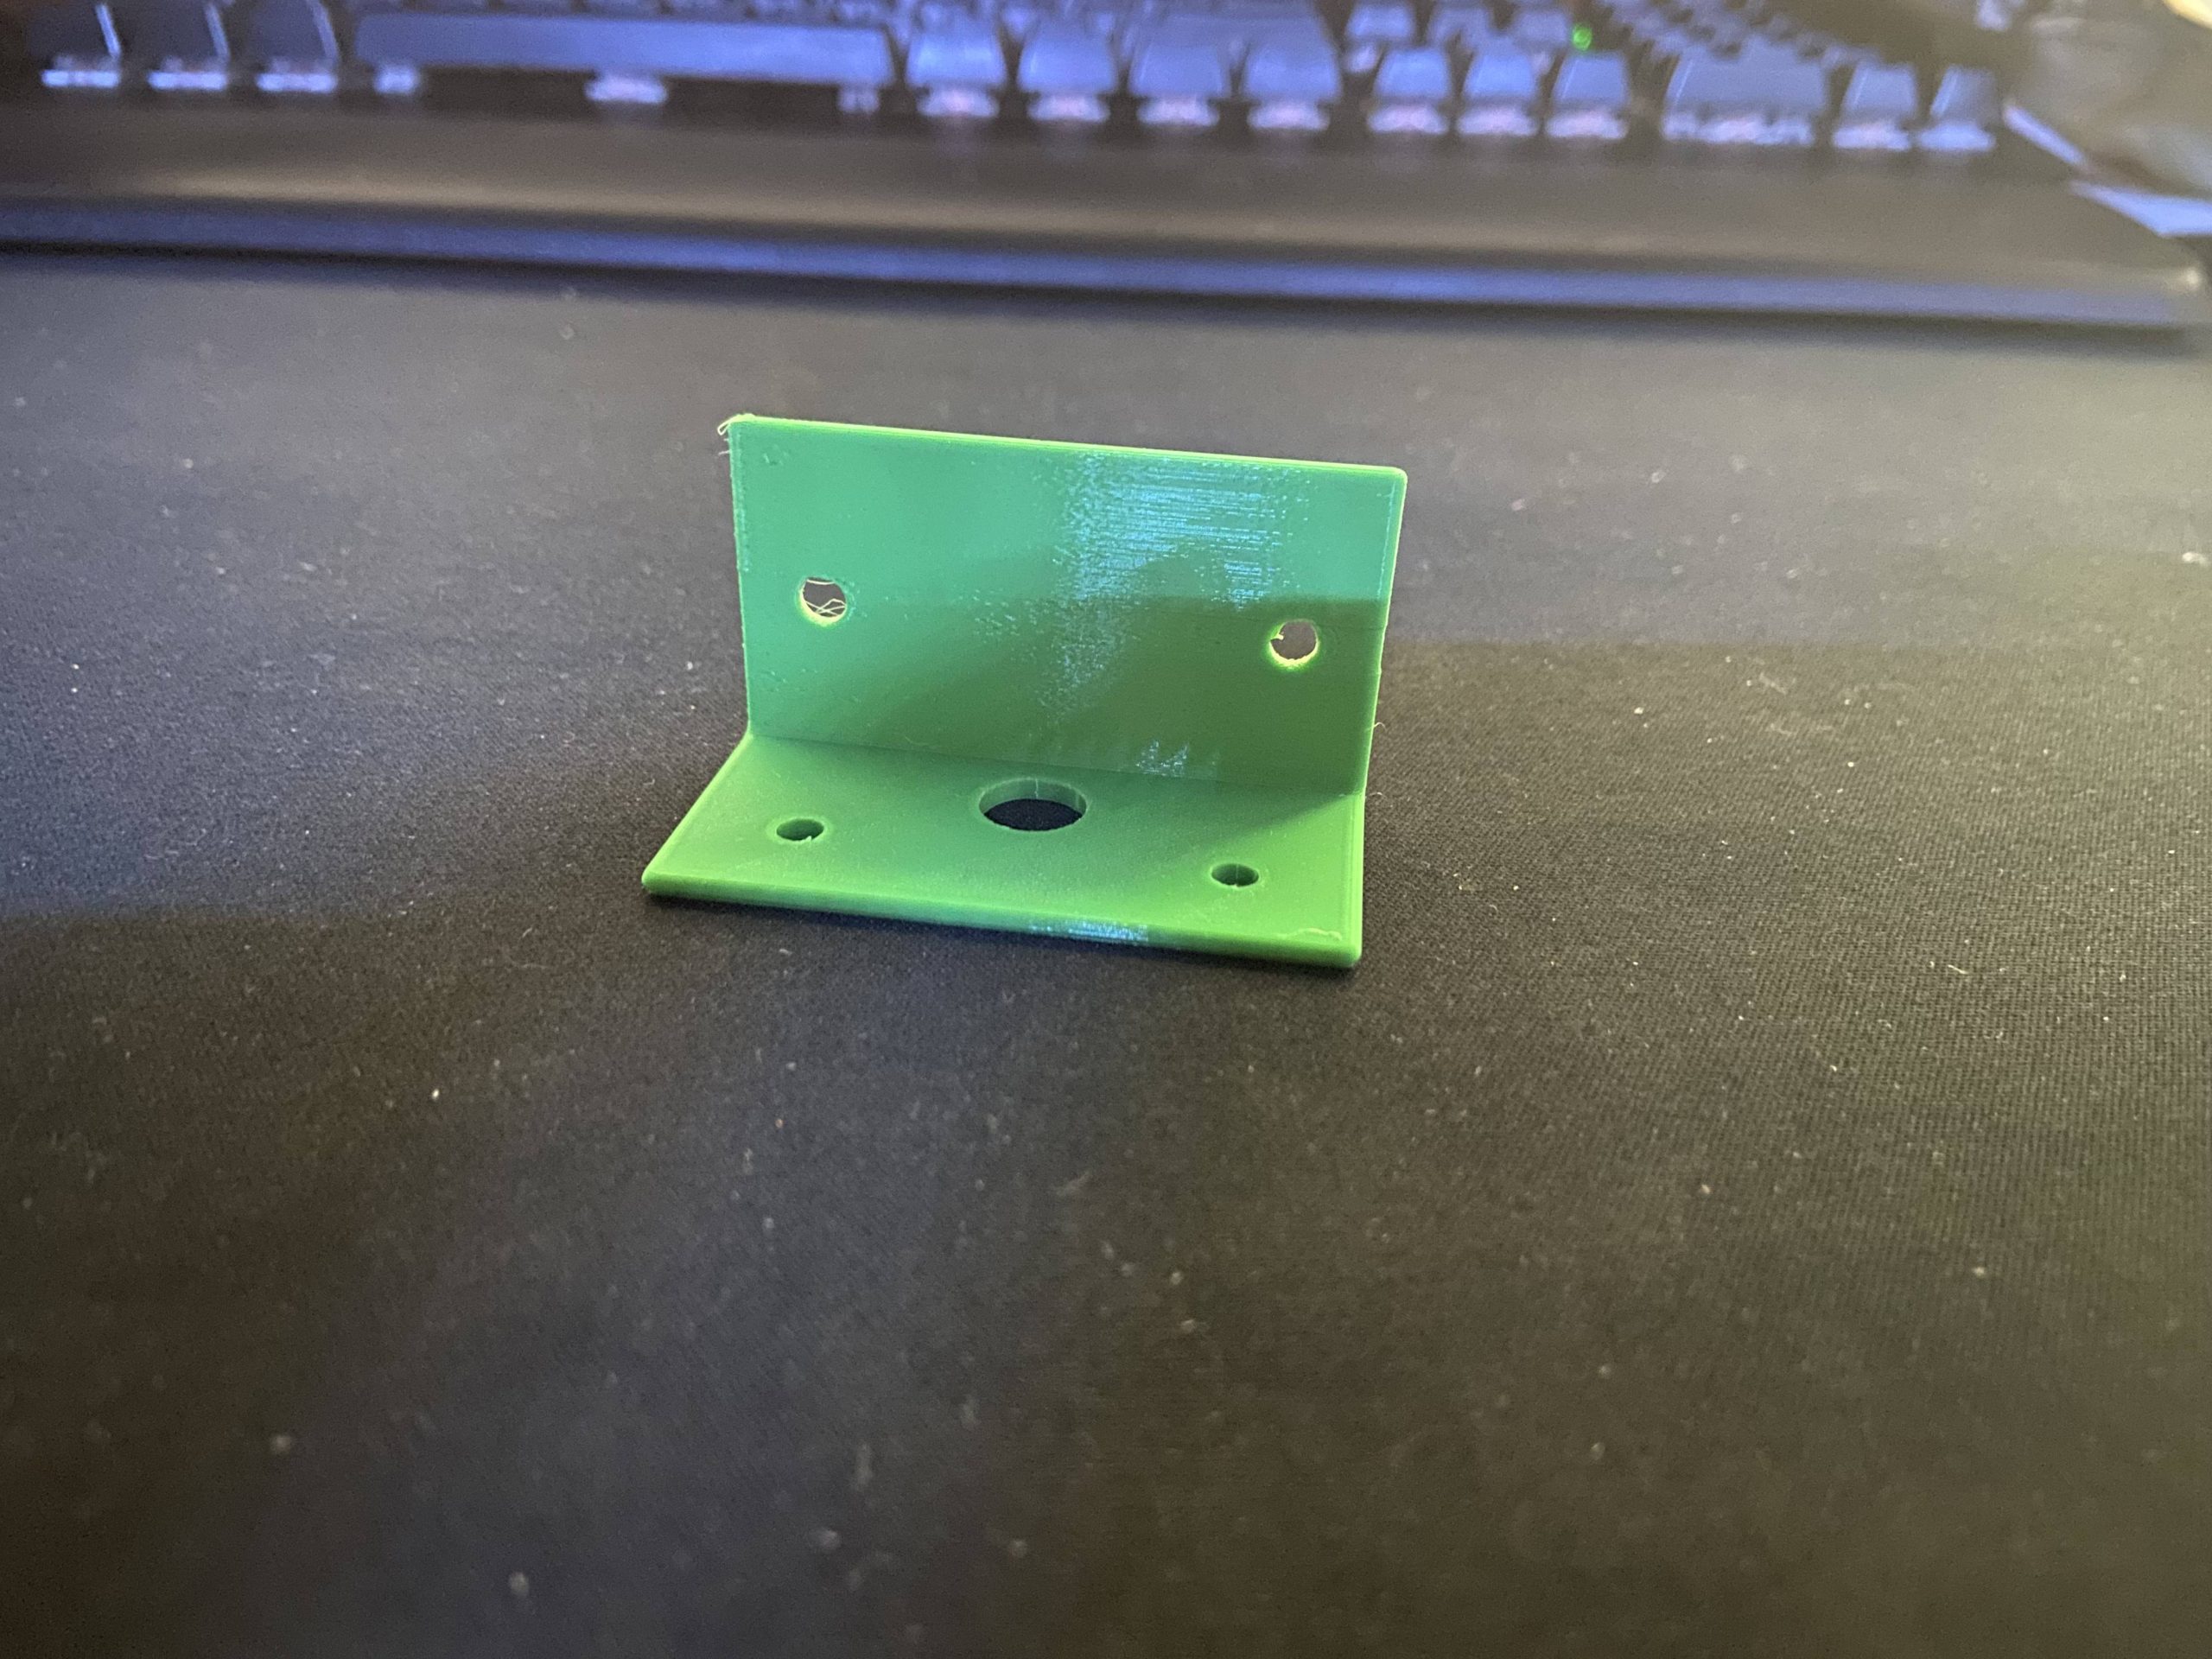
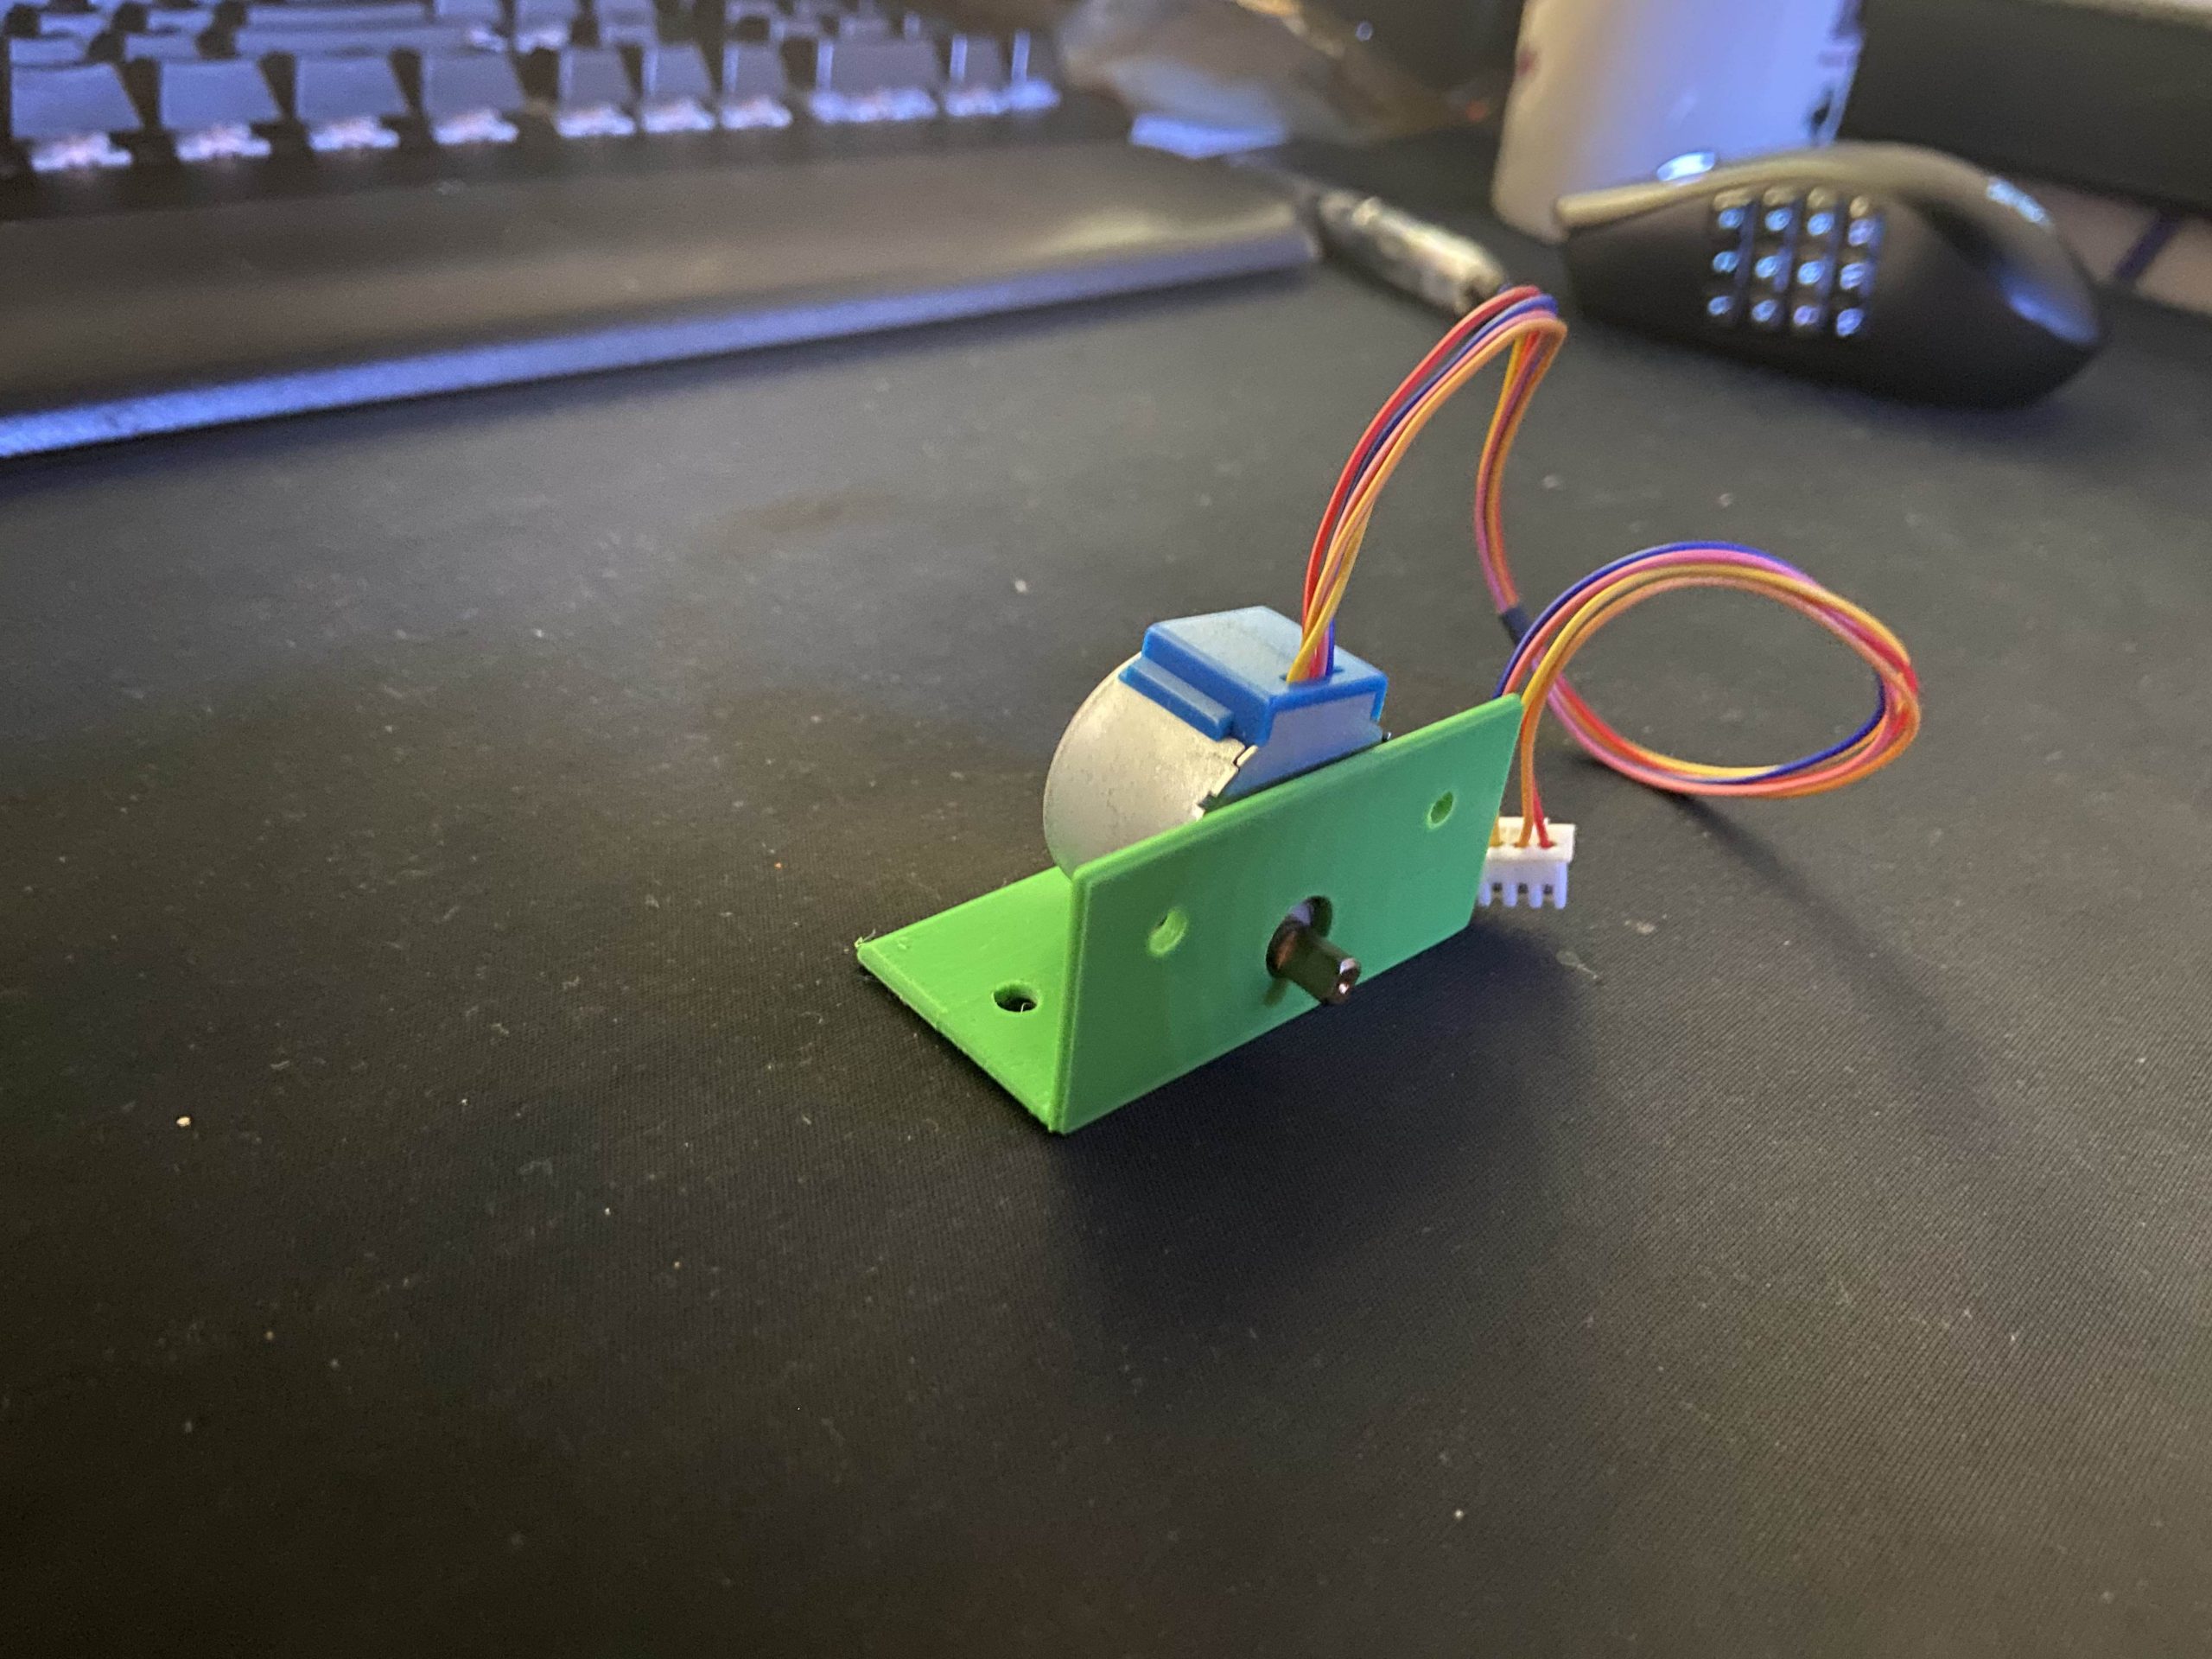
The final 3D printed model is shown below:
Recent Comments